Knit your own adventure: swatching, gauge and EPS

6

When Tricia Holman visited my Guild to give a talk and workshop I didn’t think much of it. I knew Tricia carries on a knitting tradition begun by her aunt Elizabeth Zimmermann (EZ). What I couldn’t have known is how much my knitting would change as a result. 

Tricia visited the Guild in February with piles of beautiful and creatively constructed garments and hats to discuss how her aunt’s approach to knitting influenced her own designs. 

EZ, known as the grandmother of American knitting, is famous for her newsletters, a mathematical approach to knitting called Elizabeth’s Percentage System (EPS) and the “Surprise Jacket” patterns. 

Tricia noted that EZ’s knitting was deeply influenced by European traditions and that she was an advocate of Continental-style knitting (picking instead of throwing the yarn). EZ did not like purling and opted for knitting in the round or garter stitch patterns like the surprise jackets that have become a favourite with knitters around the world. That’s something else niece and aunt share. 

“I don’t like purling or sewing up. There are some who like it. What is so special about the surprise jacket is it’s really knitted origami,” said Tricia as she demonstrated how a single piece of knitted fabric could be folded into the surprise jacket. The guild members tittered in delight. 

Swatching is not for dummies

If EZ wasn’t a fan of purling or sewing up she certainly was a fan of swatching and test knits. If you’ve seen her Knitting Workshop DVD there are some Sasha dolls on the set sporting little sweaters and hats. EZ herself is surrounded by balls of yarn and swatches. 

That’s because for EZ gauge is everything. That and figuring out how to knit smarter—bending the knit to her vision instead of the other way around. Again her niece Tricia has taken her aunt’s what-if attitude. Through swatching and testing she has her own EZ-inspired designs. 

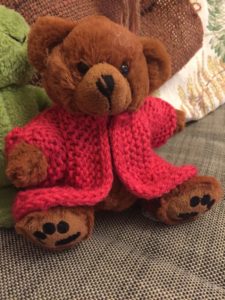
Tricia had many sizes and variations of the surprise jacket on show—from “very large nephew” size to tiny ones modelled by teddy bears. They showed the jacket’s flexibility. Just change the number of stitches or the gauge to change the size. 

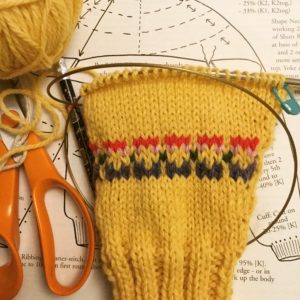
little bear jacket

At the workshop Tricia had us do a teddy bear-sized surprise jacket. I’ve knit a surprise jacket before and I still screwed it up. But if you’re only working on a mini version, then it doesn’t matter so much when you need to start over. Also, you can learn the technique before you jump in to start the real thing. 

Tricia’s other top tip was to make a swatch hat. Want to try out a new idea? Why not make a hat to see if it works. It’s a technique Tricia used for her own patterns including her Spiral Sweater.

Knitting for spinners

Tricia is a spinner and says, “I get lots of wool as a spinner and then you’re on your own with patterns. That’s where the Elizabeth Percentage System is great. I can’t answer how much wool you will need but if you’re a spinner you can always spin some more.”

The Percentage System is a calculation for sizing garments based on gauge and desired body circumference.  “EPS” consists of a simple mathematical formula to determine how many stitches to cast on for a sweater, based on chest circumference and the assumption that sleeves and body are usually proportionate no matter what yarn or gauge is used.

Tricia’s message to spinners who knit was, you don’t need to follow patterns slavishly or be put off by sewing up (or even purling!). With a little imagination and some simple math you can easily make yourself a sweater that fits. 

Choose your own knitting adventure 

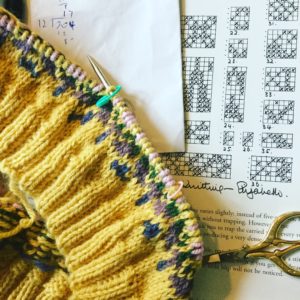
Cuff with peerie flowers

Many of EZ’s patterns are based on EPS and are sort of a choose your adventure approach to knitting. She gives you a map. You do the rest. It will all work out fine–if you swatch.

Knitting without a pattern had been out of the question for me, mainly because of lack of confidence, due to a longstanding laziness about swatching. I rarely swatched. I now realise that was dumb–especially for a spinner who knits. 

After a couple of hours with Tricia I was raring to go. I busted out my EZ’s Knitting Workshop DVD, my copy of the Opinionated Knitter and some yarn that had been lingering in my stash way too long.

casting on the body

I cast on the body, did a little leaf fair isle pattern (more stash yarn!). Now I’ve done the body and a sleeve. Once I get another sleeve knitted then it will be time to dive into the yoke knitting. I love yoke sweaters and am excited for this step. Still thinking about what kind of pattern to use. 

In anticipation of my next EPS knit, I’m spinning up some yarn for a Gansey. Now that I know I can choose my own knitting adventure based on the gauge of the yarn I’ve made, well the possibilities are endless! Yay. 
But how much mordant do you *really* need?

2

This is THE question, isn’t it? I think a lot of people, myself included, just start with a formula they find somewhere but don’t take the time to test it against other options. The good news is, I’ve done a test for you. I’ve done a mordant strength test with aluminum acetate previously; this is a mordant strength test with potassium aluminum sulfate, aka, alum mordant for protein fibers.

My underlying question in doing this experiment is how best to handle wool, alpaca and silk blend roving— how much heat, agitation, time and mordant gives the best result? And do I need to use cream of tartar (potassium bitartrate)? My preferred outcome will be good color uptake while still having a nice hand and easy spinability.

The first recipe I came across was from John and Margaret Cannon in Dye Plants and dyeing, which uses 18% WOF alum and 6% WOF cream of tartar. I started using it and had good results, but in my natural dye class we use 10-15% alum with no cream of tartar. I usually bring my mordant bath up to temperature (about 160-170F), turn off the heat, and let my fiber sit overnight. In class (where we generally use fabric samples, not yarn or roving) the fiber is at constant temperature for an hour (170F or so— not boiling, but steam coming off the water) and then removed and rinsed. The least amount of alum mordant I’ve seen used is from Jenny Dean, just 8%, but with 6% cream of tartar.

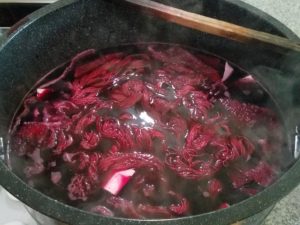
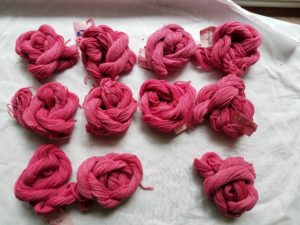
This experiment is my fairly best comparison of apples to apples to apples, starting at the low end of 8% alum, ending at the high end of 18%, and splitting the difference at 13%. All mordant strengths are tested with and without cream of tartar, and processed at heat (170F) for one hour, or brought up to heat and then turned off and let sit overnight, for a total of 12 different samples. Both wool, silk, wool/silk blends and a silk/plant fiber blend were sampled, in the form of fabric and also commercially prepared organic undyed yarn. All samples of the same mordant bath were processed together, and all samples were wetted out for at least an hour. In the end, ALL of the samples went into the SAME dyepot of 20% WOF cochineal, a good strong dyepot, with the hopes of disambiguation.

There were some interesting results!

Even before I mordanted anything, the visual difference between the alum with/alum without cream of tartar bath was obvious. With cream of tarar, the bath was clear. Without, it had a cloudy, milky look. This persisted after the fiber was removed from the mordant bath. The ph of each bath remained the same, about 3-4.

After I’d mordanted my samples, but before I’d dyed anything, I tested  the hand, or feel, of all my samples— the common complaint about increased alum strength is that is can make the fibers feel “sticky”. With all of my wool samples, regardless of alum%, those without the cream of tartar felt coarser. The yarn especially felt sticky without cream of tartar. On the silk noil samples, the samples WITH cream of tartar at 8% mordant strength had a more noticeable yellow cast . The hand of the silk noil and habotai were not discernibly different, but the silk-faced plant blend and the wool/silk were definitely smoother/nicer with the 6% cream of tartar.

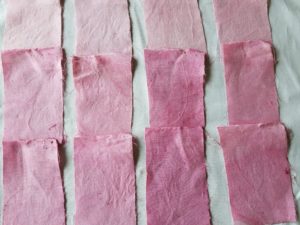
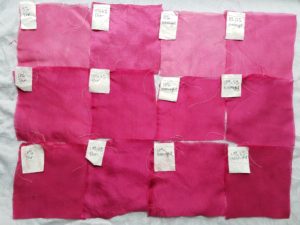
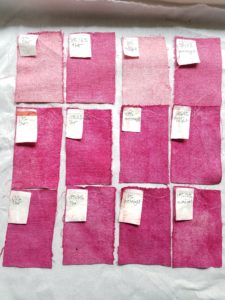
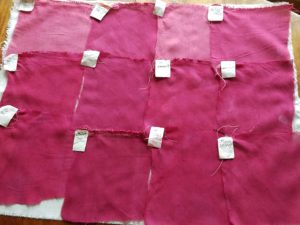
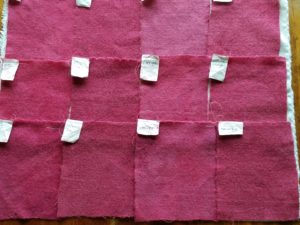
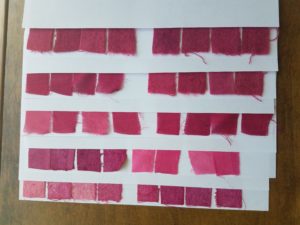
So what about the color? Take a look! These samples are all laid out in a 4×3 grid as follows:

8% 1hr, 8%/6% cream of tartar 1hr, 8% overnight, 8%/6% overnight

13% 1hr, 13%/6% 1hr, 13% overnight, 13%/6% overnight

18% 1hr, 18%/6% 1hr, 18% overnight, 18%/6% overnight

Silk/hemp blend— my “control”. In real life I’d use aluminum acetate to mordant this.

Silk habotai. The cream of tartar definitely helps the dye uptake, especially noticeable at the lowest strength mordant.

Silk noil. The unevenness of color I attribute to not enough wetting out time. In the future anything with silk will soak overnight.

This is a thin 60%silk/40% wool twill. I was surprised that I liked the 18%/6% 1hr mordant the best.

Medium weight wool challis. Not as great a difference between the 13% and 18% mordant strengths as on the silks.

Commercially prepared undyed organic merino yarn. I didn’t scour it, and I should have! I think the color uptake at all mordant strengths would have been much better. The 18% overnight skein is missing— I ran out of yarn.

Takeaways:

Its pretty clear that more mordant equals more dye uptake. This was a strong dyebath, with plenty of color left over (I dyed several more yards of fabric afterwards with the leftover bath). Between 13% and 18% the difference isn’t as stark as at 8%, so I might do an additional test at 15%WOF and see if I can see a big enough difference to merit the additional mordant.

It’s not so clear in the photos, but the samples mordanted on heat for one hour had a nicer, more even color than the ones brought up to temperature and then left to cool overnight. This surprised me. In the future I will probably keep on heat for one hour, then let cool naturally before removing the fiber. This has also dissuaded me from trying a recipe I found on the internet for mordanting in cold water!

I will definitely be wettting out silks overnight, and scour any fiber I haven’t already prepped myself. I will use cream of tartar, for both mordant uptake and nicer hand. The final test, of course, is a light-fast test. My hypothesis is that the higher mordant strength will be more fast.

Light-fast test in progress.

At this point I’m of the opinion that the prep work, from scouring through mordanting, is the key to nicely dyed fiber. The dye bath is basically proving how good a job I’ve done. A stronger dye bath won’t produce any more color than the amount of mordant bonded to the fiber. This test was done with cochineal, which won’t dye without some sort of mordant; if I was dyeing with something substantive like onion skin, the extra mordant strength may be unnecessary.

I hope this helps answer the question of how much mordant *you* really need: by all means, do your own experiments!