Get Weaving in 2015

2

It’s worth repeating that there are lots of benefits of joining a weaving, spinning and dyeing guild and that rigid heddle looms are simple yet powerful tools.

During the Guild’s fleece to scarf challenge in November I got to know two of my fellow guild members better–Sarah Howard and Elisabeth Kendrick. Sarah and Elisabeth are accomplished weavers, knitters, spinners and sewers. They have a few books out (Creative Weaving, is one) and Get Weaving is the latest.

Sarah and Elisabeth have inspired many over the years–including me–by showing there’s a lot more you can do with a rigid heddle loom than make scarves or table runners. Their new book demonstrates how to make garments from fabric handwoven on small looms (mostly 20 inch width).

I’ve picked out a few favourites.

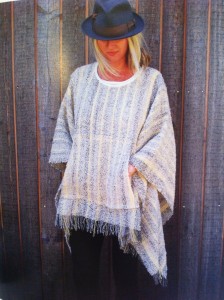
I love this poncho. It’s made from several panels of fabric sewn together and as Sal pointed out, it has a pocket!

poncho

poncho

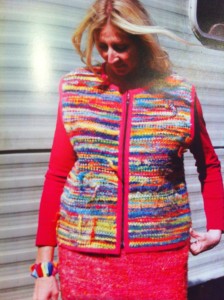
This bodywarmer is made from fabric woven with roving (ie unspun wool). What a great idea. This kind of garment is definitely a project I want to try.

Body warmer

Body warmer

And I love this jacket. It’s made from strips of rags. Just beautiful.

rag jacket

rag jacket

There’s lots more in the book–trousers, shorts, skirts and blouses. All made from fabric woven on the rigid heddle loom!


Guild Challenge: The Electric Kool-aid Fiber Test, Part 1

2
Jumping off point

Jumping off point


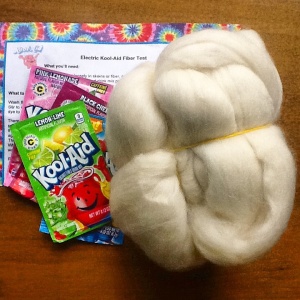
We received our new guild fiber challenge at the October meeting. It’s pretty straightforward: dye some fiber with some Kool-aid, and make something out of it. The only caveat is that the finished project must show some of the original color of the Kool-aid we used. We were given 4oz of Polworth roving and a couple of packets of Kool-aid to start us along. The final projects are due at the February 2015 guild meeting.

This project is a lot more open ended than the last one, where we had an upper limit of fiber and assigned colors to start out with, and for which my project won a prize. Because of that, I’ve been at a bit of a loss as to which direction to go. My tendency to overthink things isn’t helping. In fact, I’ve been overthinking this for almost two months now.

We were given a piece of paper with Kool-aid dying directions, and the link to this Knitty article. It’s like any other acid-dying, with the added bonus of Kool-aid already containing citric acid. I searched Ravelry for some Kool-aid dyed projects for inspiration, and I found this hat, which uses yarn that is gradient-dyed. She also has a nice blog post about gradient-dying. This is a pretty cool technique, but I’ve talked to a lot of my fellow guild members, and they all seem to think they’re going to dye their yarn after it’s spun. I don’t want to show up with the same project as someone else.
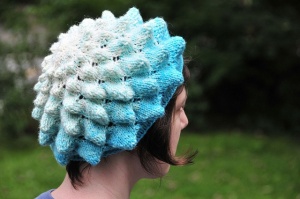
Saxarocks' gradient-dyed Chyrsanthemum Hat; pattern by Xandy Peters

Saxarocks’ gradient-dyed Chrysanthemum Hat; pattern by Xandy Peters

I also considered trying this shibori dying and weaving technique that Rachel did, but my loom is in limbo right now, so until I have a place to set it up, no weaving for me.

I decided to go with the challenge name itself for inspiration, based on The Electric Kool-aid Acid Test by Tom Wolfe, about author and Merry Prankster Ken Kesey (from Oregon!). I’ve read this book, along with Kesey’s One Flew Over the Cuckoo’s Nest. Kesey also has a book called Sometimes a Great Notion, which I bought at Powell’s and have started to read. It’s really, really great, and I regret not reading I sooner, and my finished project will definitely reflect this book in some way.

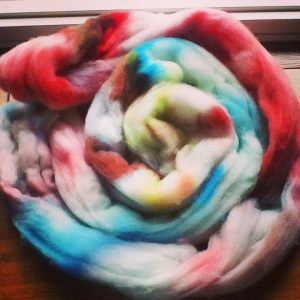
In the meantime, I’ve embraced the spirit of these books, and put my 4oz of roving in a dye pot along with my Kool-aid, just to see what would happen:

Sprinkle dying
Sprinkle dying

image

Sprinkle-dyed roving

It’s pretty, but one packet to one ounce of roving did not saturate the roving at all, and I’m left with a lot of white parts. I ended up blending the different resulting color ways on my drum carder, and then spun it according to color for a self-striping effect. This is what I ended up with, 275 yards of 2ply dk weight:

Weird pastel yarn

Weird pastel yarn

Verdict? I hate it. The colors are flat. Back to the drawing board.
How to make a White Christmas wreath

2
White Christmas Wreath

White Christmas Wreath

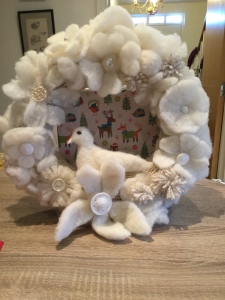
The holidays always sneak up on me despite the ample reminders from shops who start stocking their shelves with Christmas Fayre in September. My guild–The Mid-Essex Guild of Weavers, Spinners & Dyers–gave us two months’ warning (maybe more) about this Christmas ornament competition for the December meeting. Still I put the finishing touches on my entry–the White Christmas wreath–in the car before bringing it in to the hall.

The White Christmas wreath is made from materials that anyone who does sewing, knitting and spinning will probably have around the house–felt, buttons, a couple of beads, yarn, stuffing (wool or acrylic) and maybe a pipe cleaner or two if you’re feeling extravagant.

Like so many of my other projects I’d mapped out the what and how mentally. The first step was making some felt for the leaves and flowers. I used the wet felt method described in Complete Feltmaking by Gillian Harris. I used some white fleece I had to hand and some white iridescent angelica fiber. The felt I made was on the thin side and I did needle felt it in places to reinforce. Making the felt was the most time consuming part of the project.

felt--made from llanwenog fleece and angelina fiber.

felt–made from llanwenog fleece and angelina fiber.

The next step was to make a knitted tube that would act as the base. I used my Addi circular knitting machine and some white handspun yarn. Using the machine knitting the tube took about five minutes.

Making a ring on the Addi machine

Making a ring on the Addi machine

I then stuffed the tube with so neppy bits of wool I have in abundance–meaning the bits of wool left over from the combing/carding process. I sewed the ends together, et voila, a ring.

Flowers and embellishments came next.

adding flowers and leaves

adding flowers and leaves

As you can see from the photo I’ve opted for flowers and leaves which I cut freehand. I’ve sewed and glued on buttons and needle felted leaves and flowers into place. Lastly in a fit of inspiration I needle felted a dove to nestle above the poinsettia-shaped flower.

Oh, and I won the competition!

First trophy I've ever won for anything!

First trophy I’ve ever won for anything!

Sheep Chic

4

One reason Sal and I started this website was to show how starting with a bag of fiber it’s possible to create luxurious handmade objects.  This week I went into the Liberty of London on a mission to find wool being used in high-end fashion. I found some great pieces that I’m confident could be handmade and certainly show what’s possible with wool.

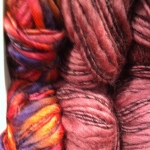
Rowan thick thin yarn--wannabee handspun

Rowan thick thin yarn–wannabee handspun

Liberty is known for its art nouveau and arts & crafts-inspired designs in the 1950s as well as its range of print fabrics. Back in the dark ages -the early 00s–when there were no real knit shops in London, Liberty carried Rowan yarns and stocked needles.

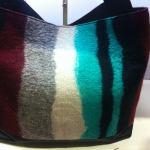
These days Liberty has some super-expensive pieces that feature wool. Check out this handbag made by Marni.

Marni bag

Marni bag

It’s made out of leather and a panel of soft felt. It retails for £765. It’s a beautiful piece that’s an alternative to the leather and gold-plated-hardware style bags that dominant the market. I wouldn’t say this would be an easy project, but if you know how to make felt, have access to a sewing machine and a bit of imagination–it’s doable.

Then there was this wrap going for £195. It’s basically a big piece of felt. Made in Italy, it’s silky soft–probably merino–and quite thin.

Felted wrap--probably about £5 worth of wool on sale for £195

Felted wrap–probably about £5 worth of wool on sale for £195

I’d guess it was made using a felting machine, but this is precisely the kind of piece that can be easily made by hand. In fact, I’ve seen many more elaborate nuno and silk pieces for sale that show greater skill than this colorful rectangle. Still it was inspiring to see such a piece showcased at Liberty.

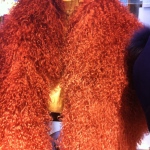
There was also this stole, which looked like a piece of shearling with a fabric backing. I didn’t see how much this piece was going for, but it’s part of the wider trend for all things shearling, soft and silky. Apparently the trend for these big fluffy wraps and collars comes from Game of Thrones’ popularity. I could see making something like this with tailspun yarn.

Shearling stole.

Shearling stole.

Intentional Color Pooling: faux Ikat

0

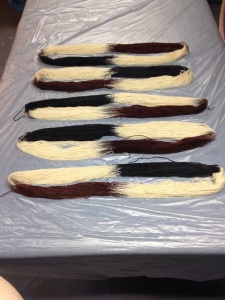
When the Early Fall ’14 issue of Vogue Knitting made it to my mailbox, I found a pretty interesting hand painted yarn creation that I wanted to experiment with:

Ikat wrap, Vogue Knitting Early Fall 2014

Ikat wrap, Vogue Knitting Early Fall 2014

It’s made using yarn from Prism, and the swatching process is pretty specific to get the colors to pool in the right places. Other than that it’s a pretty simple stockinette/reverse stockinette basket weave pattern.

Detail of Ikat wrap

Detail of Ikat wrap

I have quite a bit of white Shetland roving that I got back from one of the local mills here recently, and as soon as I have some free time I want to spin some of it up in order to experiment with hand painting yarn. I usually do single color kettle-dying fleece: I really love the depth of color I can get by blending on my drum carder, so single color batches just make sense. But this has never stopped me from buying hand-painted roving, or yarn for that matter, so I may as well make my own.

I’ve checked on Ravelry, and one Raveler has already hand painted some yarn in custom colorways to make this project, and not only did it turn out great, but there are great project notes. It got me thinking that I might be able to manipulate some commercial hand painted yarn that I’ve had forever, in a similar way.

indigonightowl's Ikat wrap

indigonightowl’s Ikat wrap

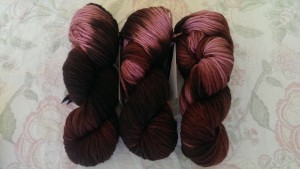
Malabrigo color Sotobosque

Malabrigo color Sotobosque

I bought this a long time ago, and in my mind it was going to end up as some sort of poncho, like the one Clint Eastwood wore in The Good, the Bad and the Ugly. And the color way reminds me of Molly Ringwald. This is probably a weird pop cultural mashup, but it makes perfect sense in my mind. Unfortunately, when this yarn is knit up in a regular pattern, the color pooling make the garment look camouflage, which is not what I’m after at all. (Again, thanks to Ravelry and finished garment pictures!)

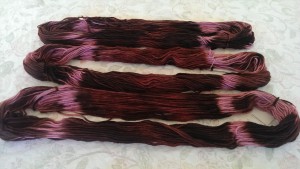
Deciphering dye patterns

Deciphering dye patterns

I think I can get a similar effect as the Ikat wrap if I keep the pink parts separated from the brown parts. And I will have my Molly Eastwood wrap. Stay tuned!

N.b. This a serape, not a poncho

n.b. This a serape, not a poncho