Nuno felting is one of those techniques I’ve always admired and wanted to try, but never got my act together to do. A couple of months back I bought Felt Fabric Designs by Sheila Smith and again my interest in nuno felting was piqued.
I was particularly interested in some of the techniques Smith shows “laminating” fabrics using felt and also upcycling thrift store scarves and fabrics into felted patchworks.
But I haven’t tried any of those techniques yet. Usually I dive in and try techniques even if they’re a bit complicated, but this time I tried some of the simpler nuno felting processes.
After a rummage in my closet I found a scarf I’ve never worn. It’s an open weave and 100% silk–ripe for nuno! Here it is on the table before felting. It’s on a strip of bubble wrap. I’ve spread light layers of Wensleydale roving and silk fibers on top.
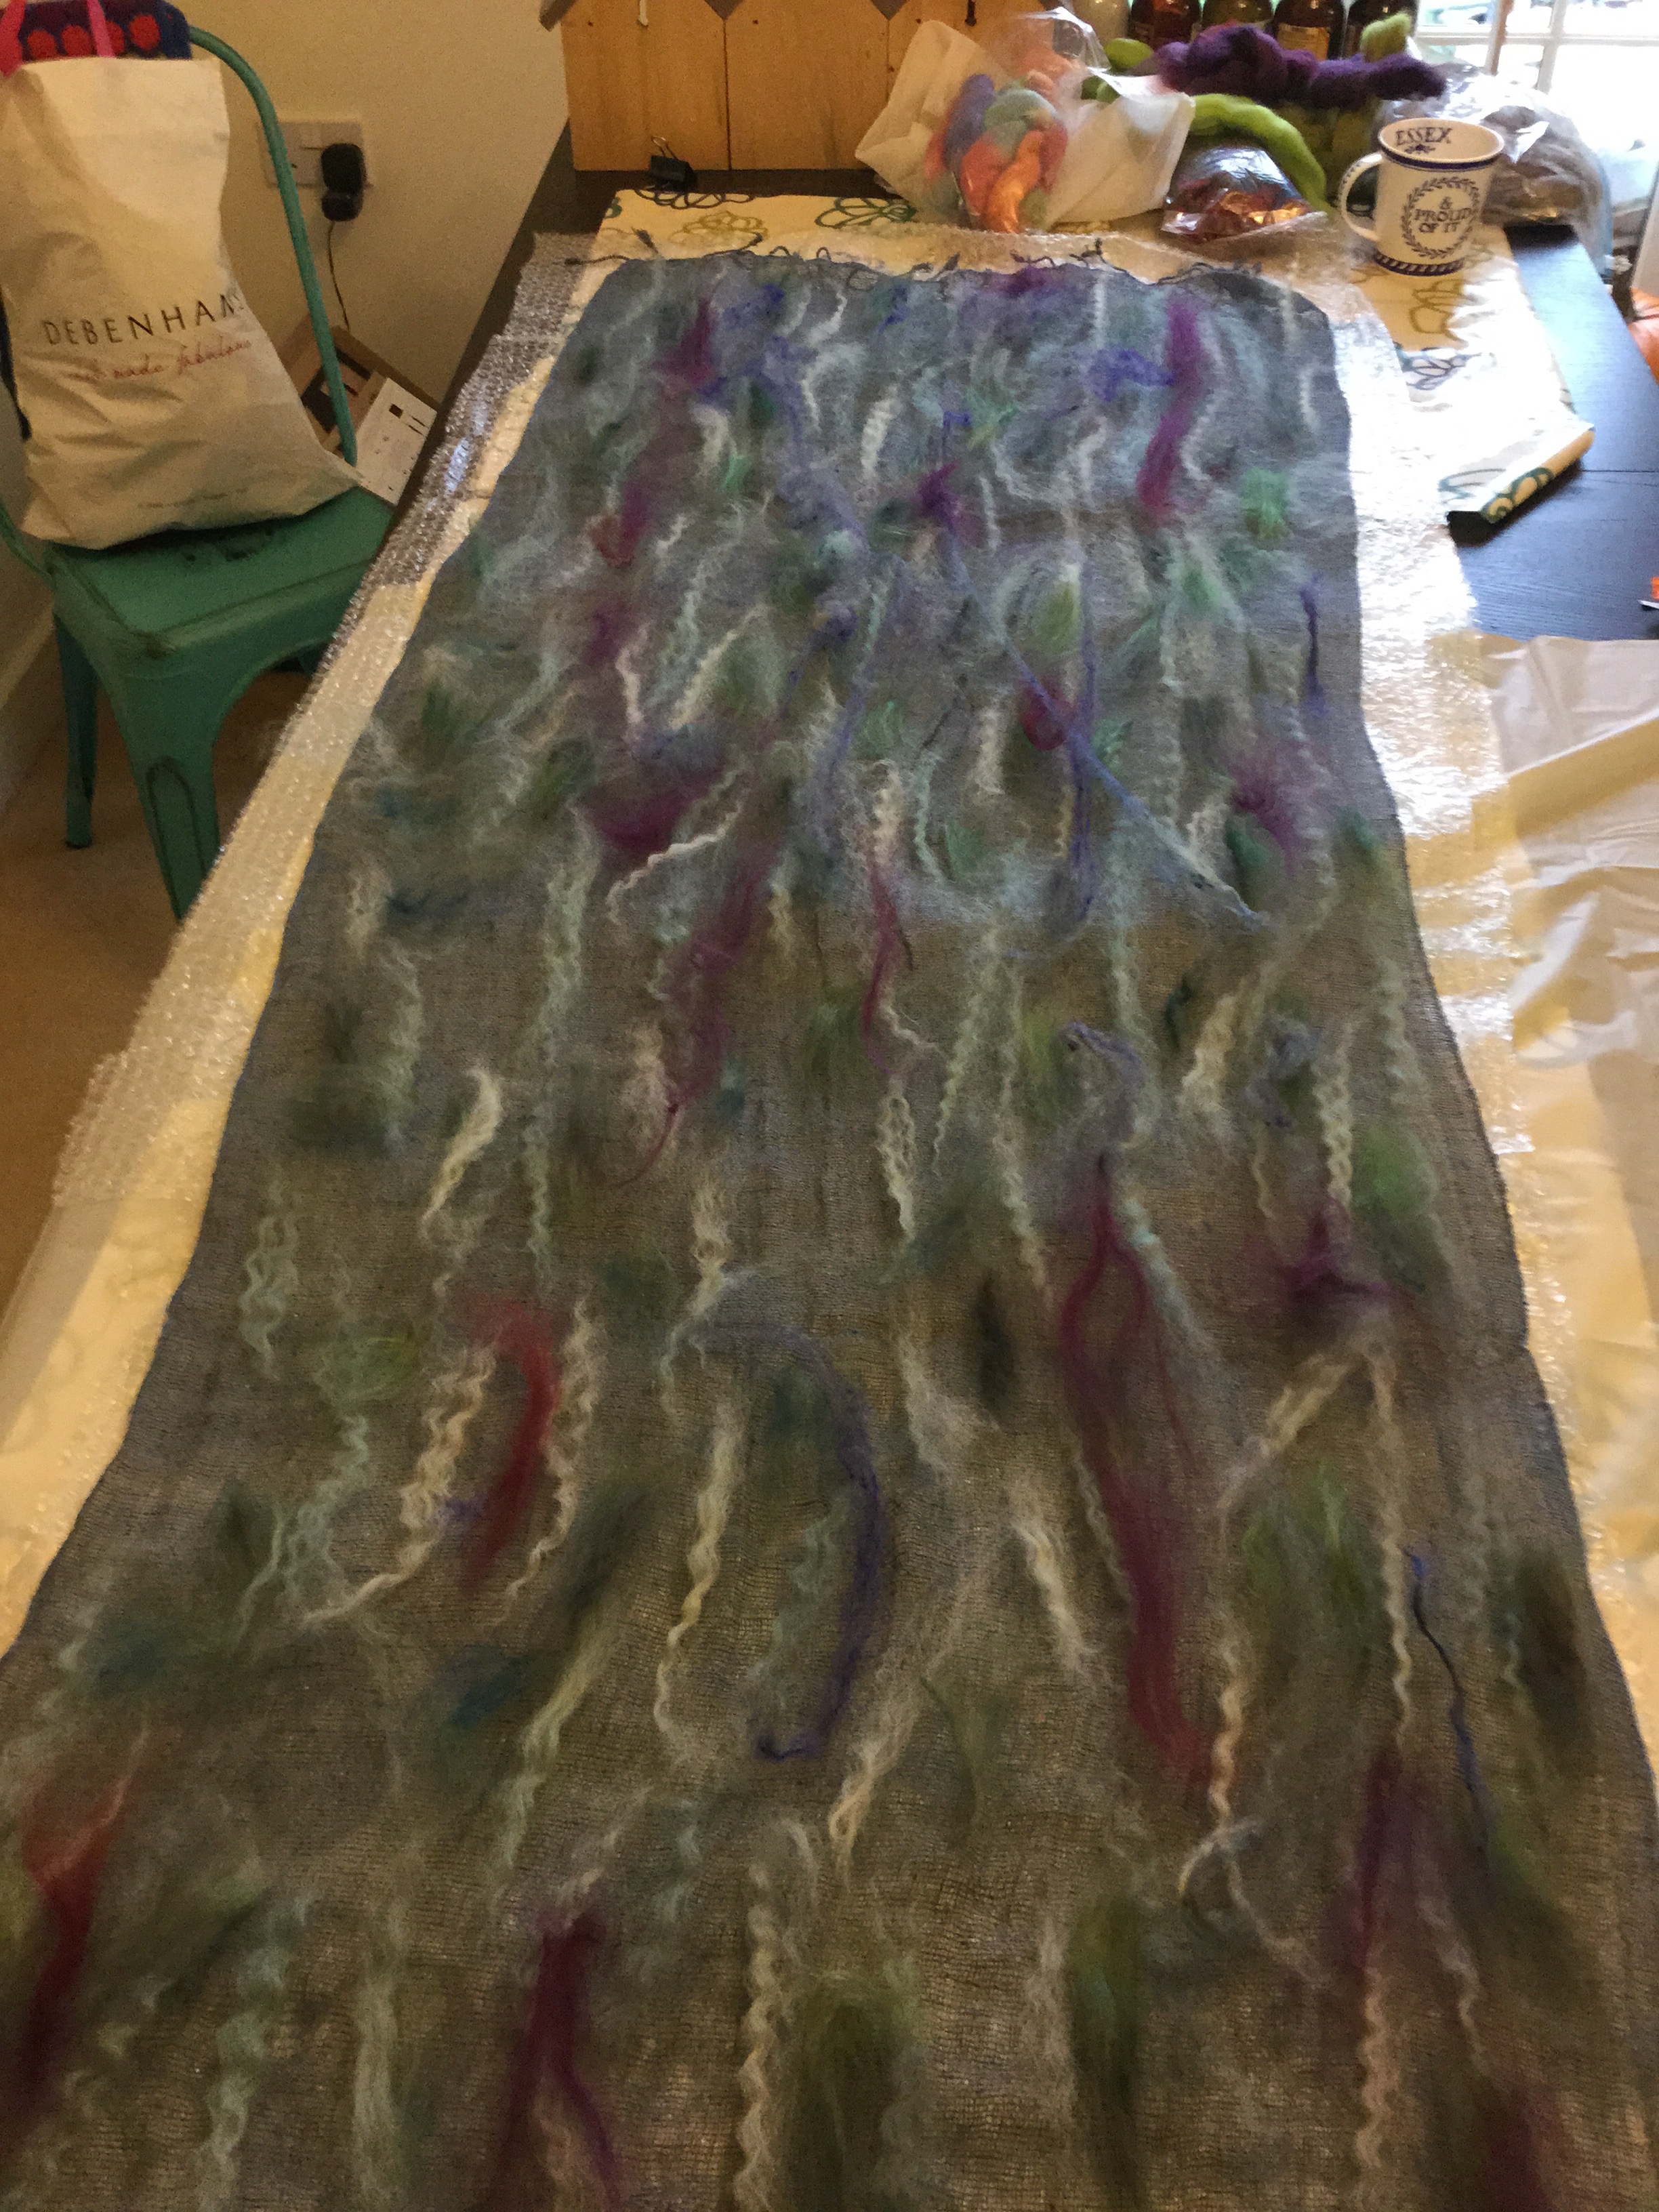
100% silk open weave scarf readied for nuno
The next step was to cover with an old net curtain, wet down with cool water, smooth some olive oil soap over the net curtain and begin to rub!
My good friend and avid felter Gaynor was on the scene to offer advice and lend her fingers for rubbing!
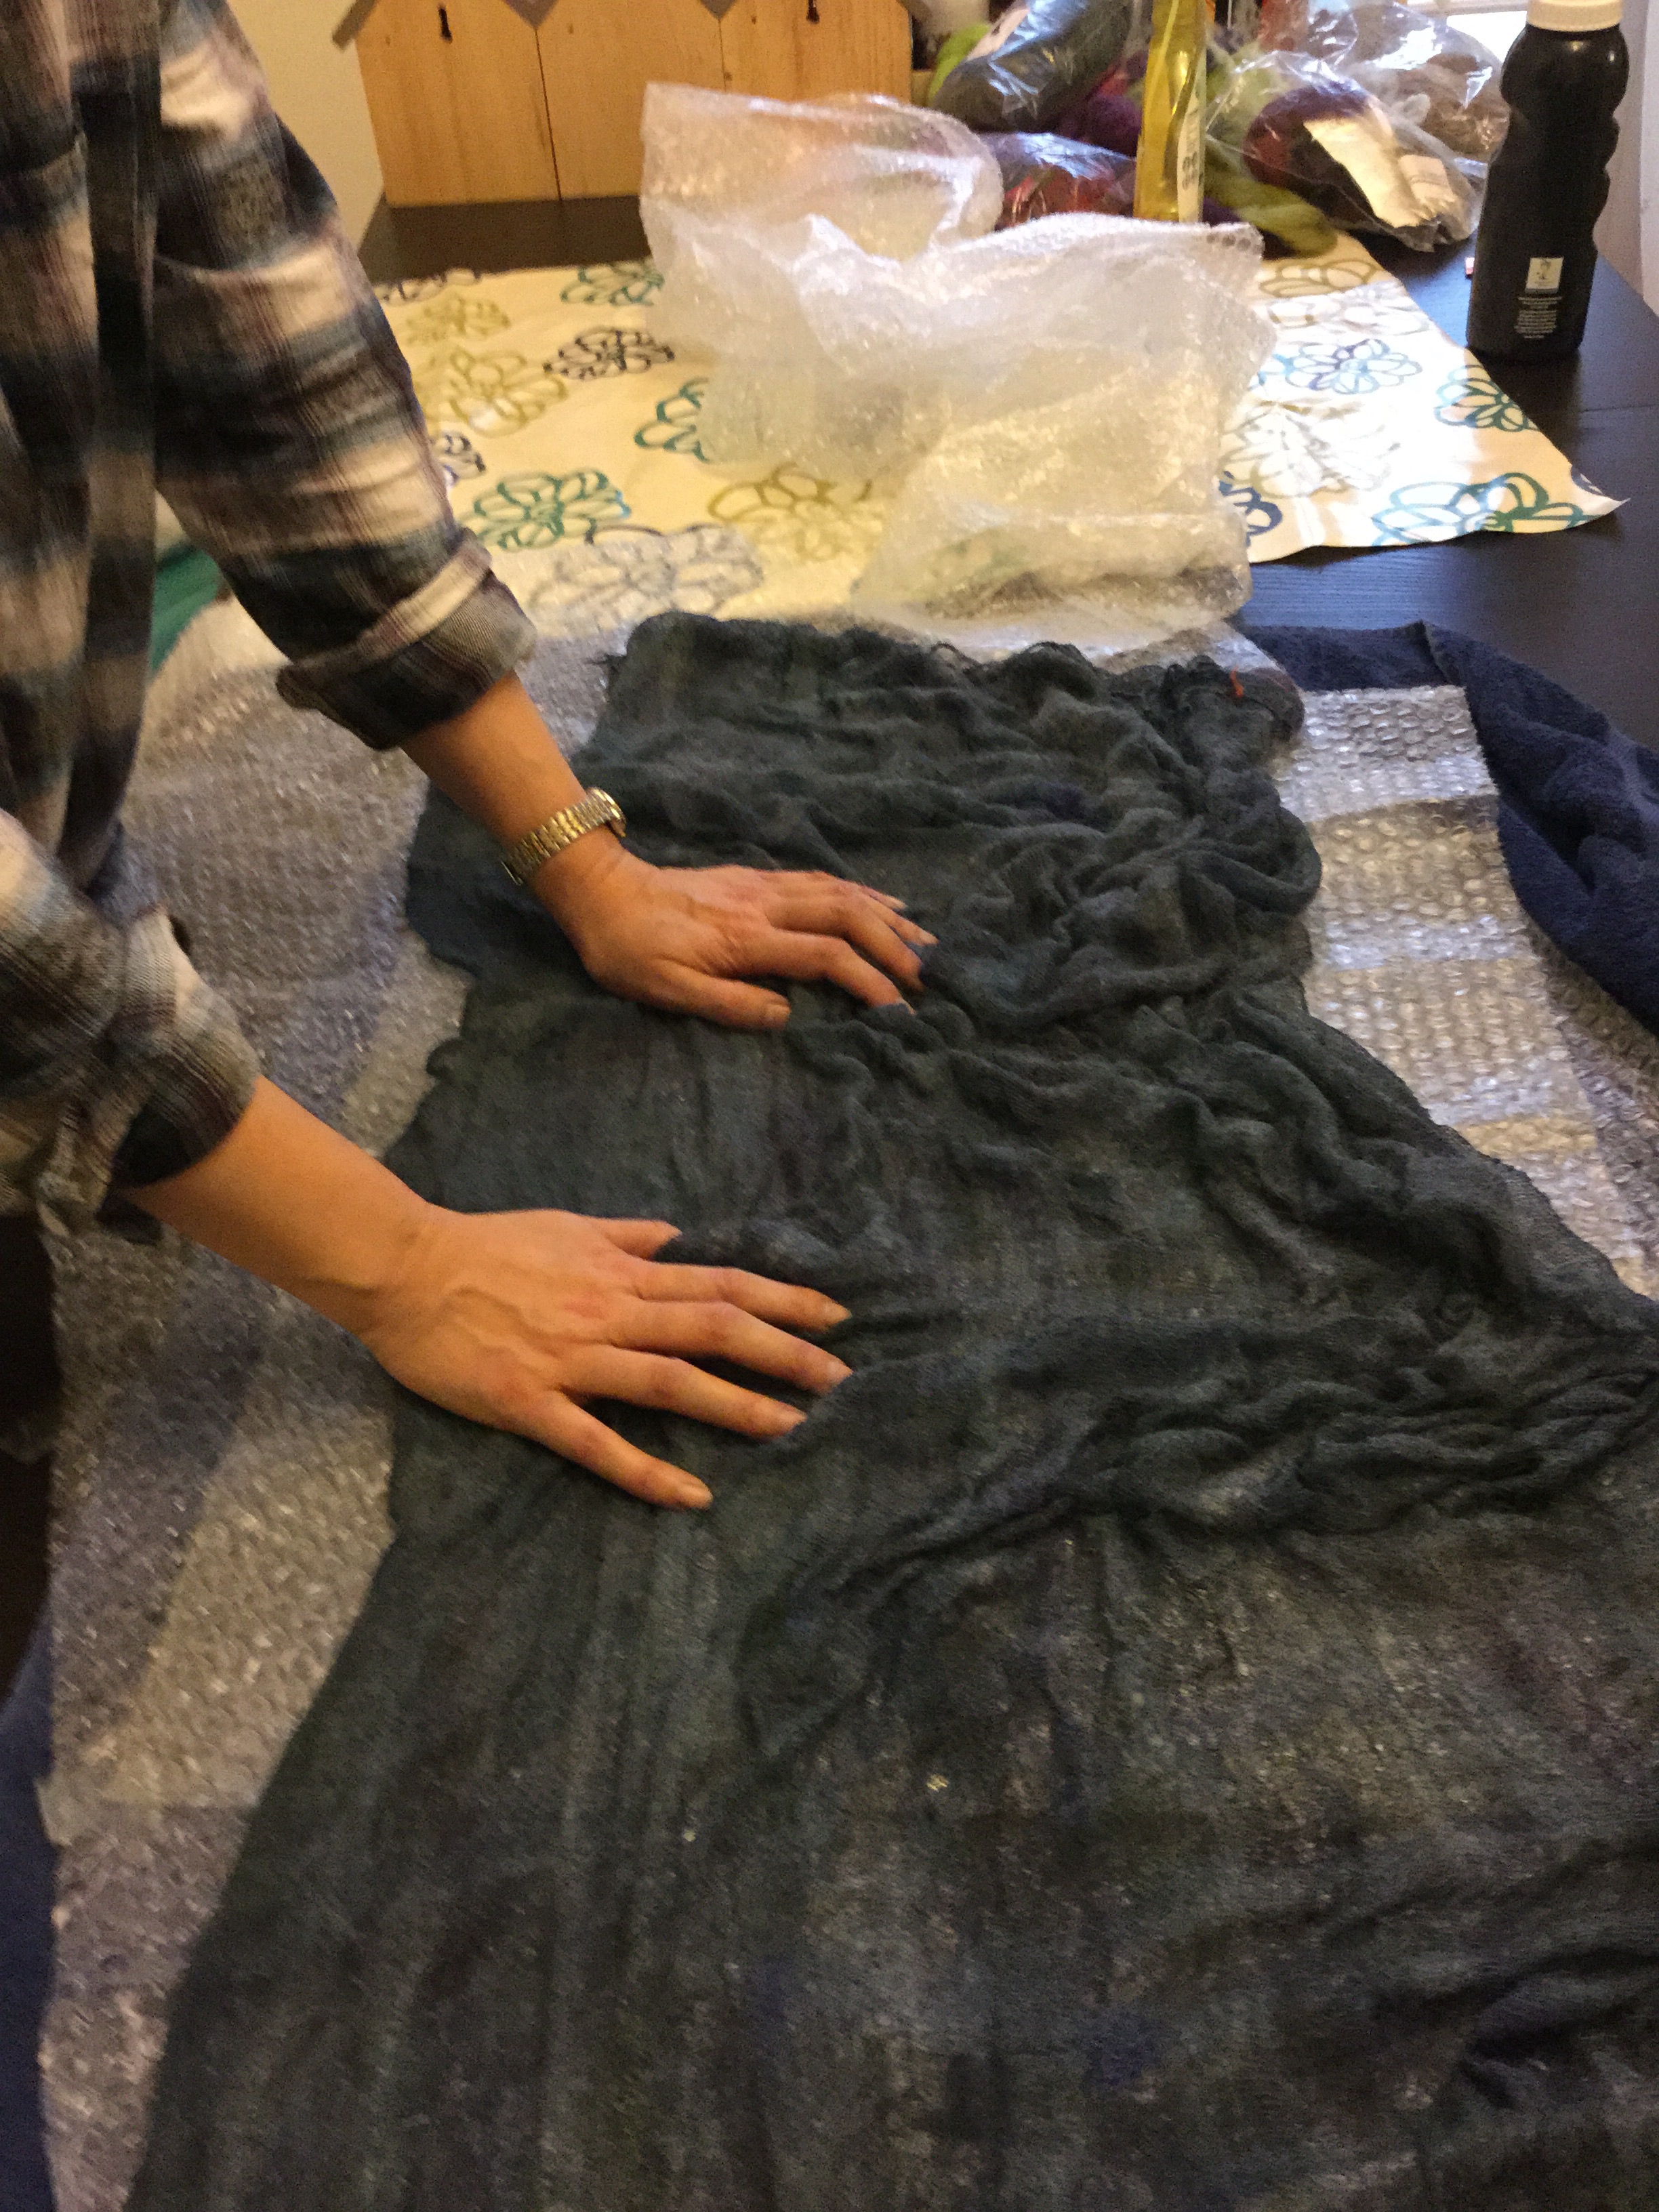
Gaynor flipped the fiber-covered side face down onto the bubble wrap to give it a little extra rub
The bubble wrap provides the friction to felt the fibers into the silk scarf. Rubbing the fabric and fiber through the net curtain starts the felting process. Once you can peel the netting off without the fibers sticking to it, you remove the netting, place another layer on top then roll it up and begin to roll.
Gaynor’s tip for rolling the fabric in the bubble wrap was to roll the whole thing in a towel and roll it and then roll it some more. We didn’t keep an accurate count but I’d guess we rolled it a few hundred times in each direction?
What do I mean by rolling it in each direction? Well, once you roll your piece of fabric a few hundred times, unroll the bubble wrap bundle and re-roll it from the opposite direction and start the whole process again. It’s good to have a friend to help with the rolling if your arms get tired or you get a bit of finger ache.
Once you’re satisfied the fiber has mingled (or stuck) to your fabric give it a rinse in very hot water. Wad it up in a ball and throw it into the sink a few times. Then rinse with cold water. Take a look at your fabric. Have the fibers you’ve applied felted into it as much as if you would like? If not, give it a few more rolls in the bubble wrap and then the repeat the hot/cold rinses and throwing process.
Gaynor and I found that with this scarf, silk felted really well but the Wensleydale took a lot of persuading. If you’re after a shiny or even metallic effect go for more silk, less wool. Once the fabric is dry give it an iron, which brings out the silk’s shine.
Here’s my final product. I love how this technique has turned a drab unworn scarf into something I’m now wearing all the time. Interested in some amazing nuno felting? Check out the Sheep Cabana Pinterest board.
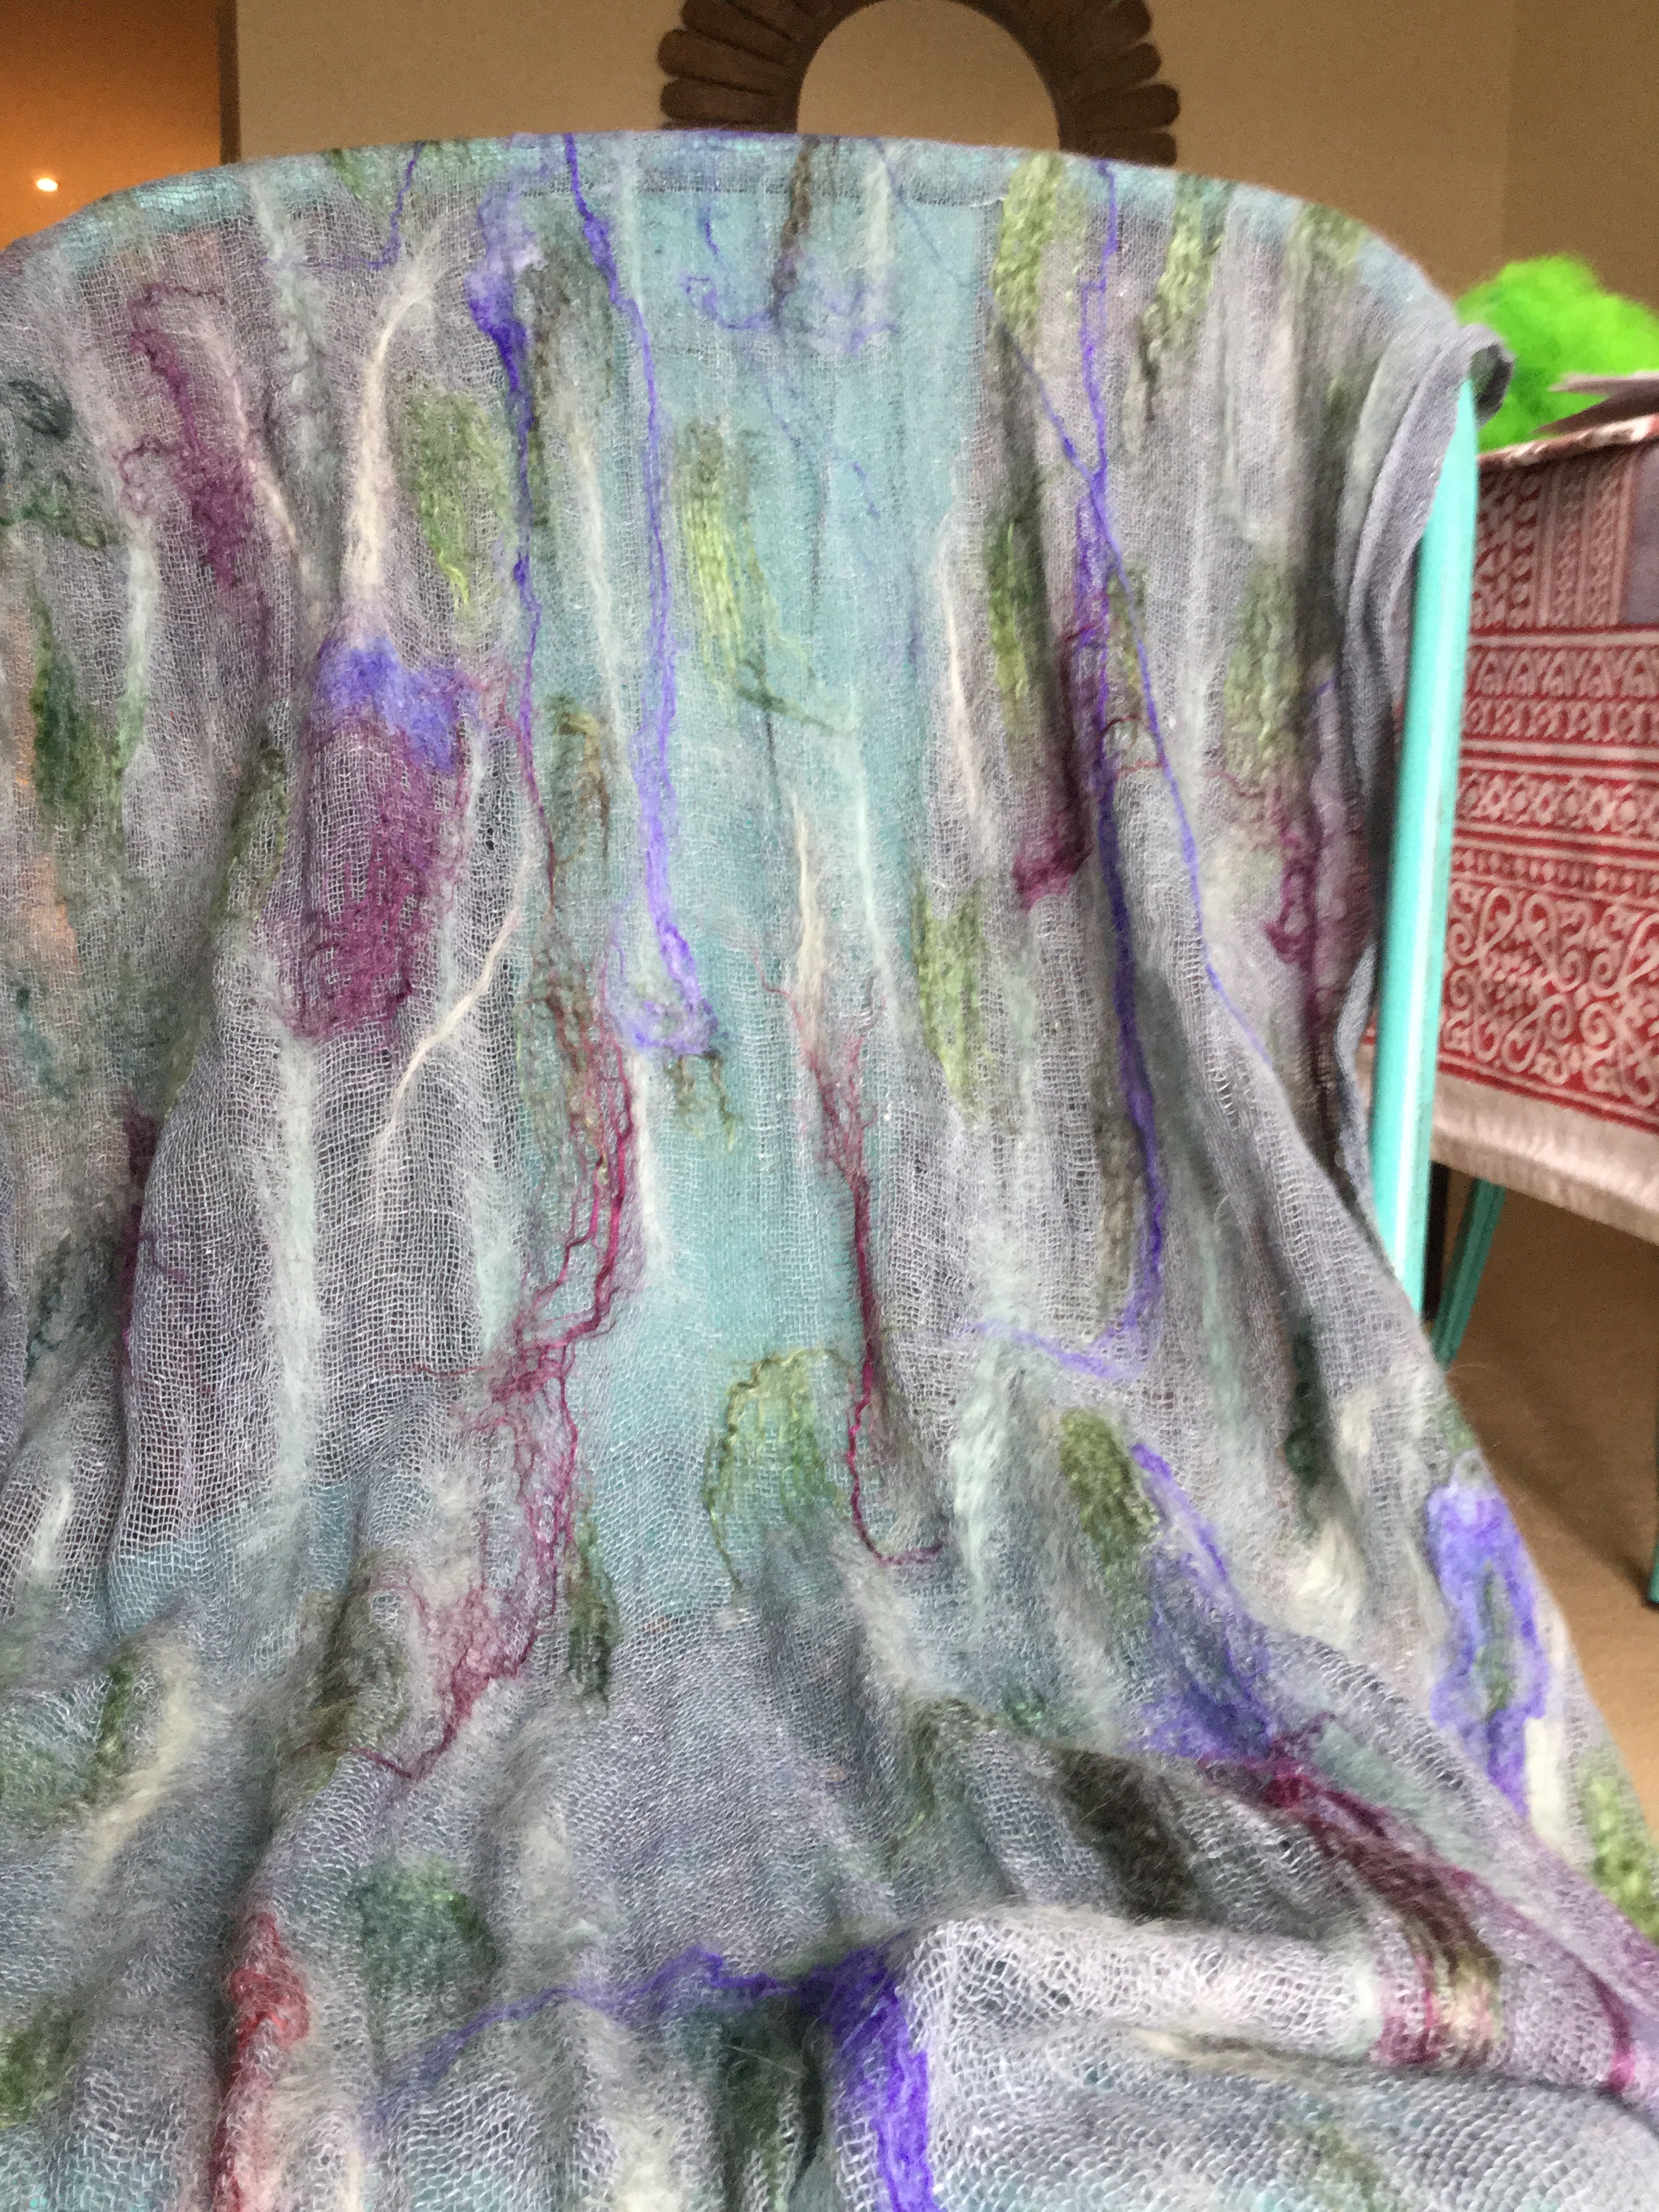
Finished scarf: drab to fab!
Love the finished scarf! Felting is now on my to-do list as well.
We can add felting to the to do list for April. 😉