After indigo, I bought a cochineal dyeing kit which contained the bugs, several mordants and some vague instructions. (I say the instructions were vague, but really they gave several options as far as time vs. temperature in mordanting. It’s one of those things that once you know what’s going on makes perfect sense.)
Rachel and I did a test run when she was here last April (Sheep Cabana retreat: dye as much stuff as possible in 48 hours), and here is what we came up with:

Cooking and straining some cochineal bugs
We started with 4oz of dried cochineal (which is a lot), cooked them for about an hour and then strained the liquid into the dye pot. I saved the used bugs for later. Then we mordanted our wool. We used some white Shetland and some grey mohair locks, and mordanted with both alum and tin, by simmering our fiber in each mordant bath for about an hour. I would say that our mordanting pots weren’t large enough, because the tin-mordanted wool definitely felted.

The dye pot, onion bag of mohair locks on top
We could have used a bigger pot.
Viola!
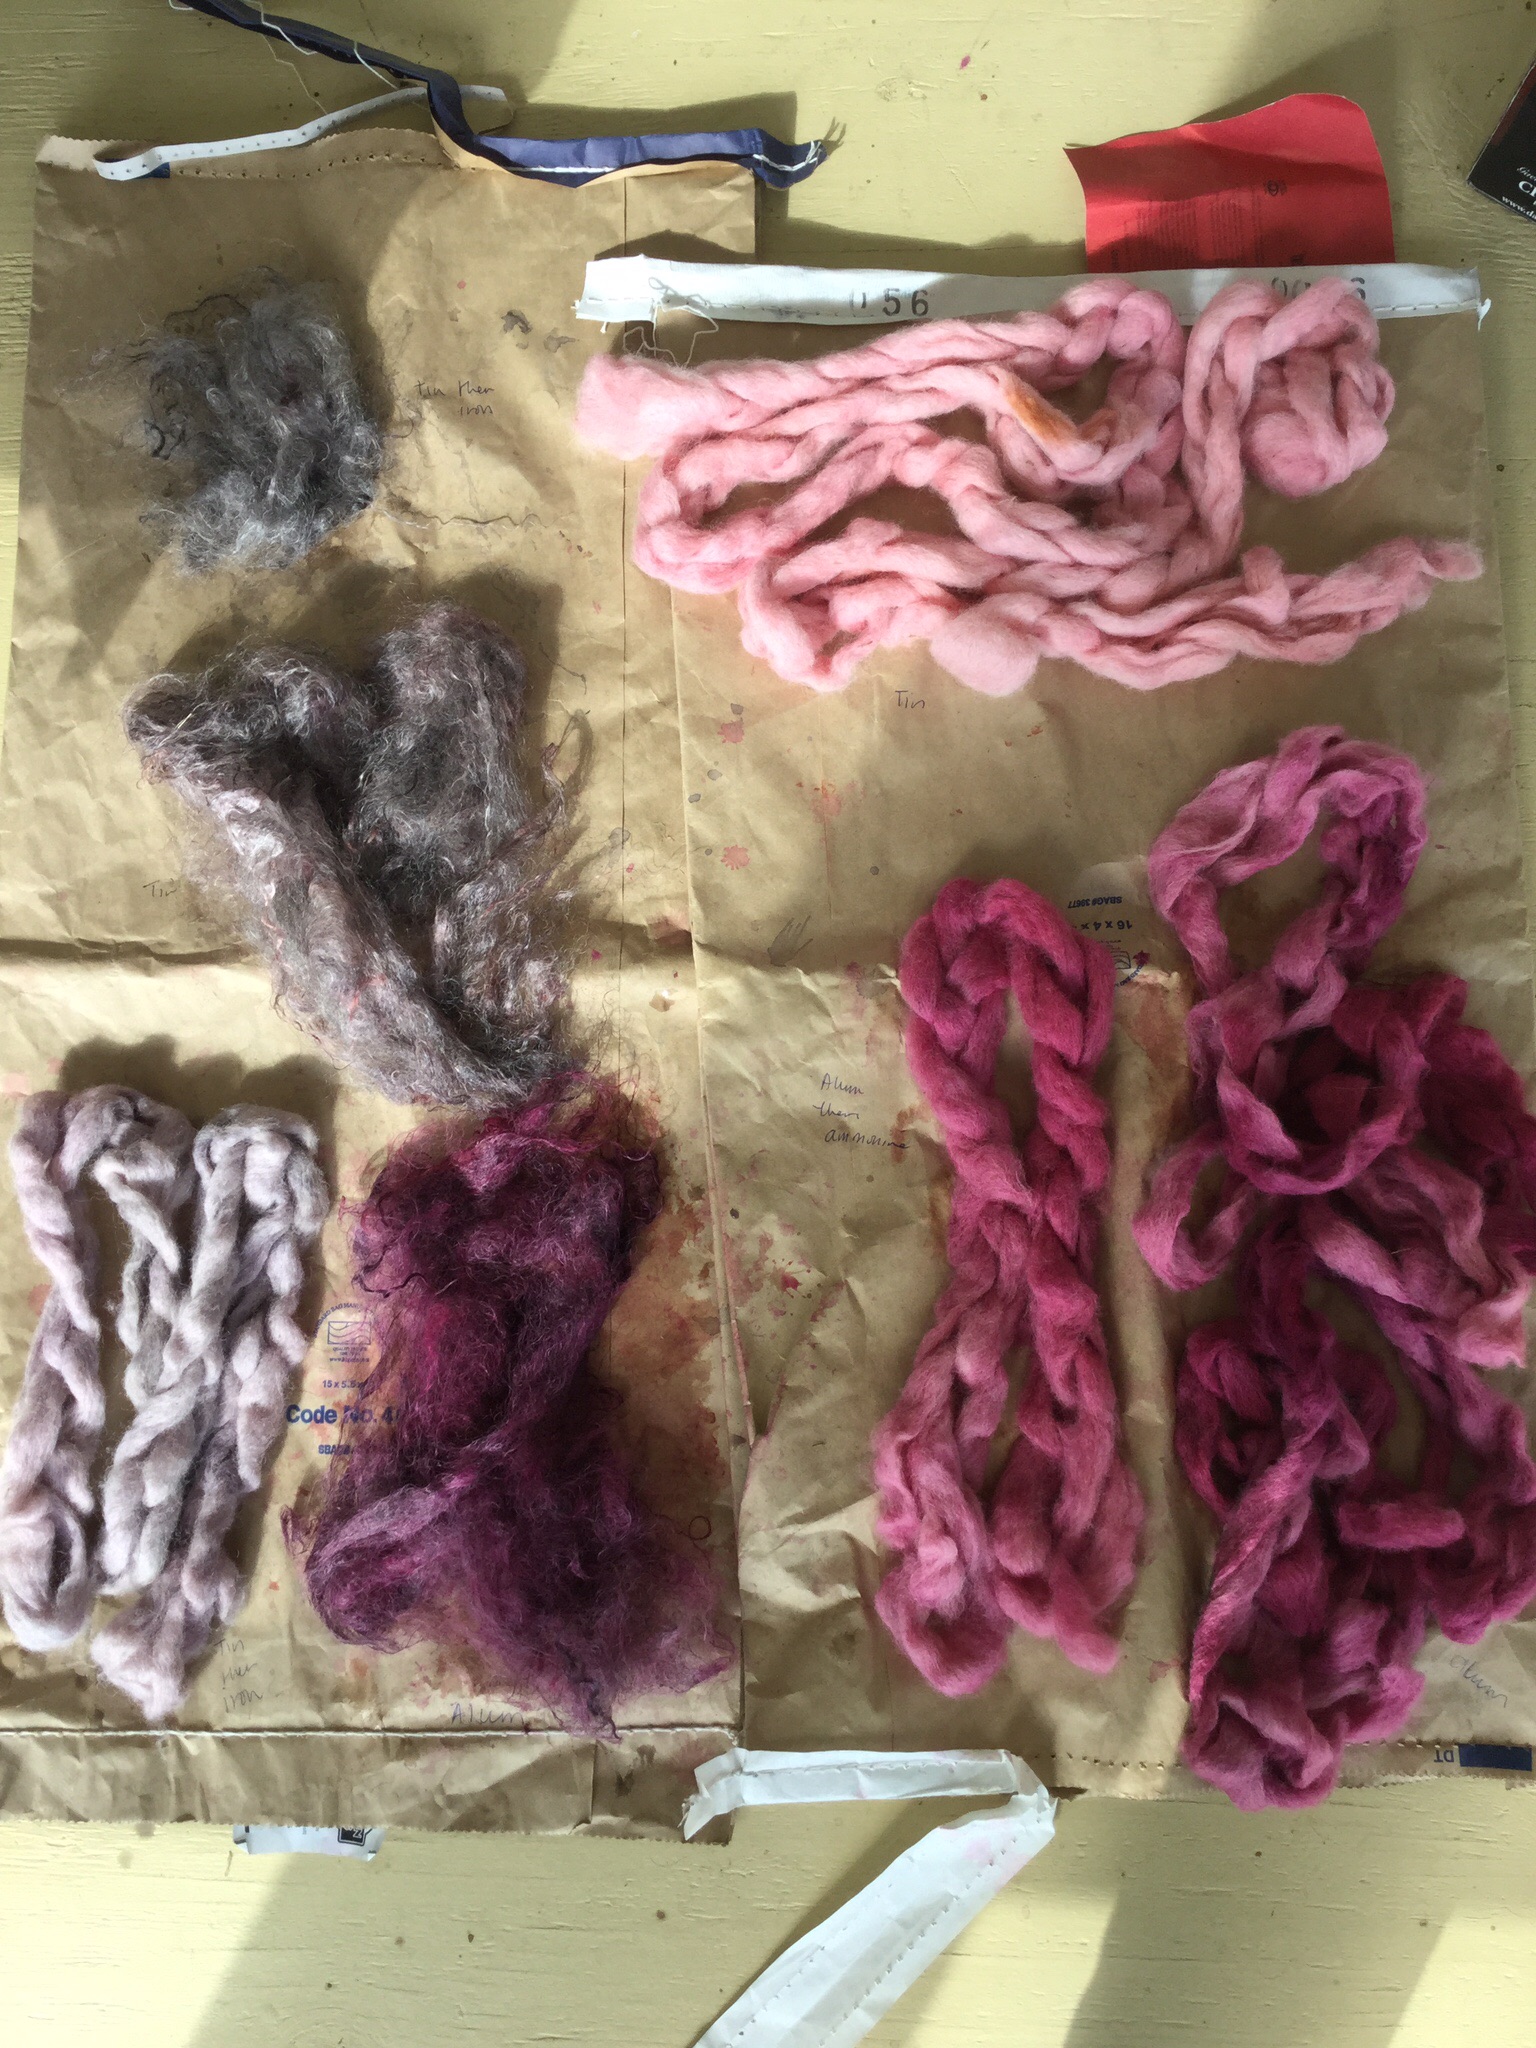
Here are the results, from top clockwise: tin mordanted wool, alum mordanted wool, alum mordanted mohair, iron after-mordanted wool, iron after-mordanted mohair.
Rachel left, and after a couple of months I got out the leftover cochineal bugs again and tried some more dyeing. (Those bugs sat on my patio in that plastic container, above, the whole time, ignored. I had no issues with them rotting or anything else unpleasant.) I re-simmered the bugs and left them sit overnight in the pot, and strained the bugs out in the morning. Then I did a series of successive dyeing on 50g each of alum and copper-mordanted wool:
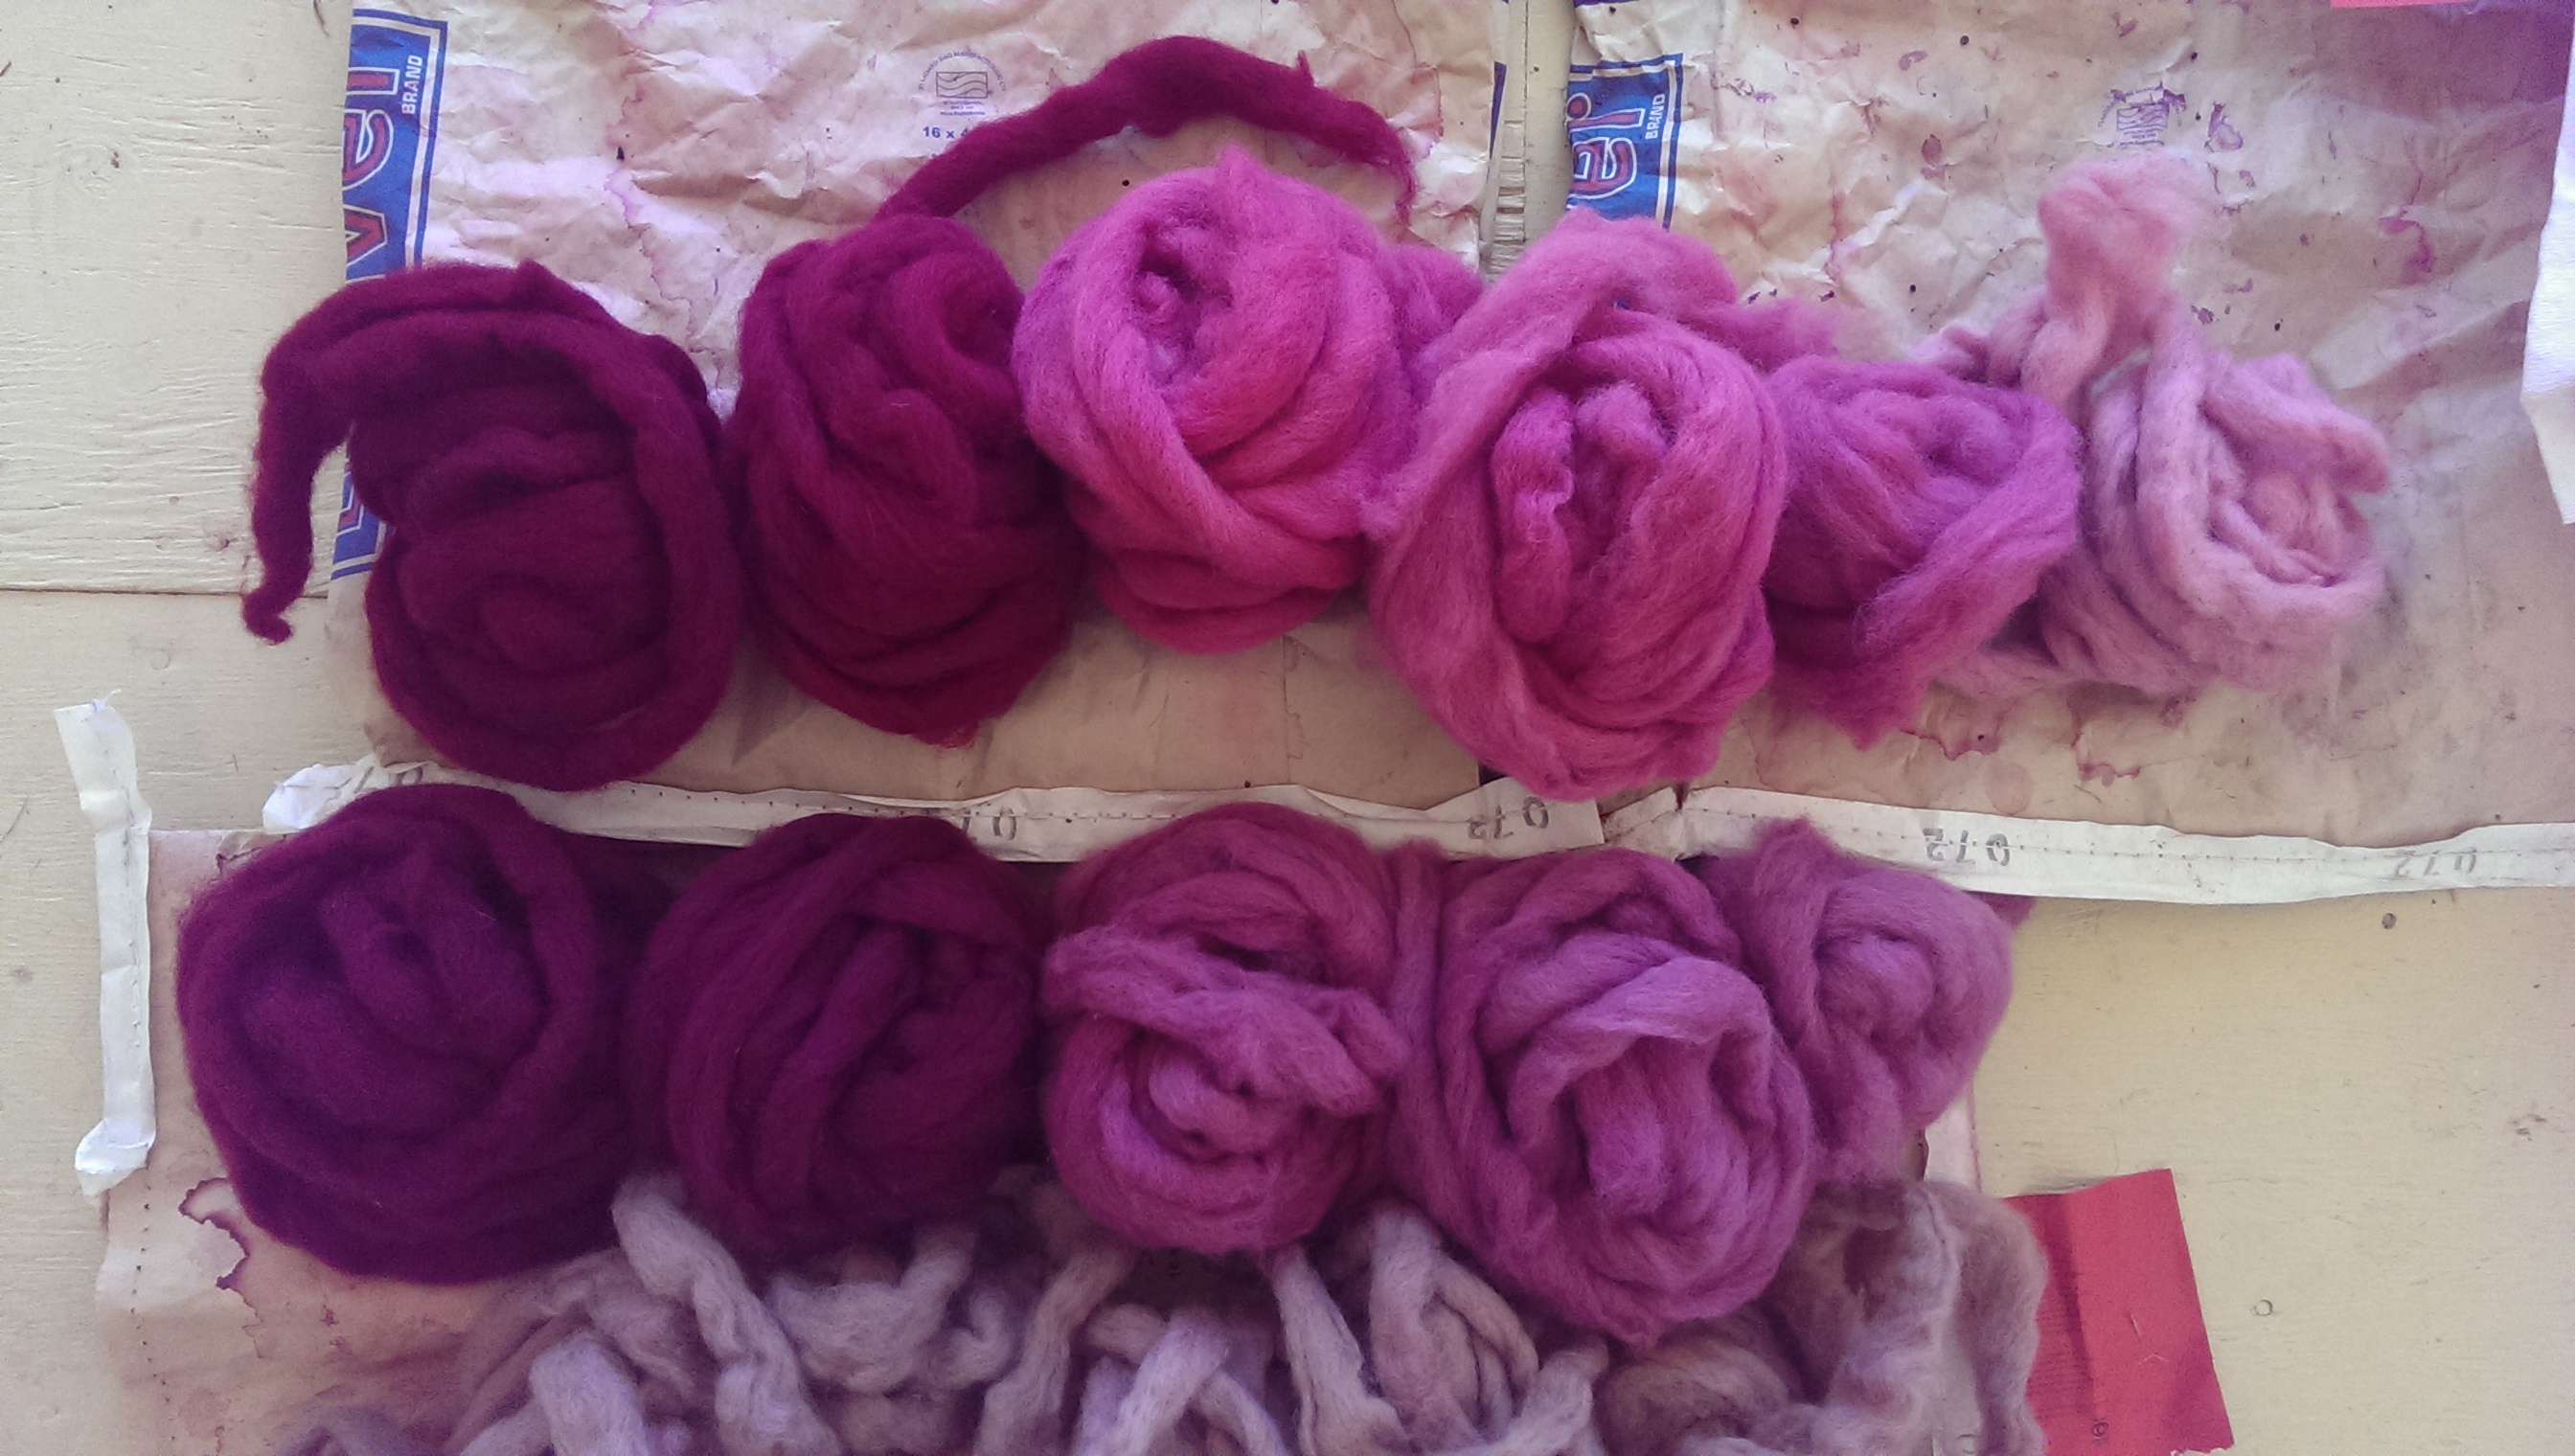
Top, alum mordant
Bottom, copper mordant
I heated the cochineal dye pot, added the mordanted wool and let it sit out on the patio here either all day or overnight. The total hands-on time was probably 1/2 hour.
Here it is spun up:
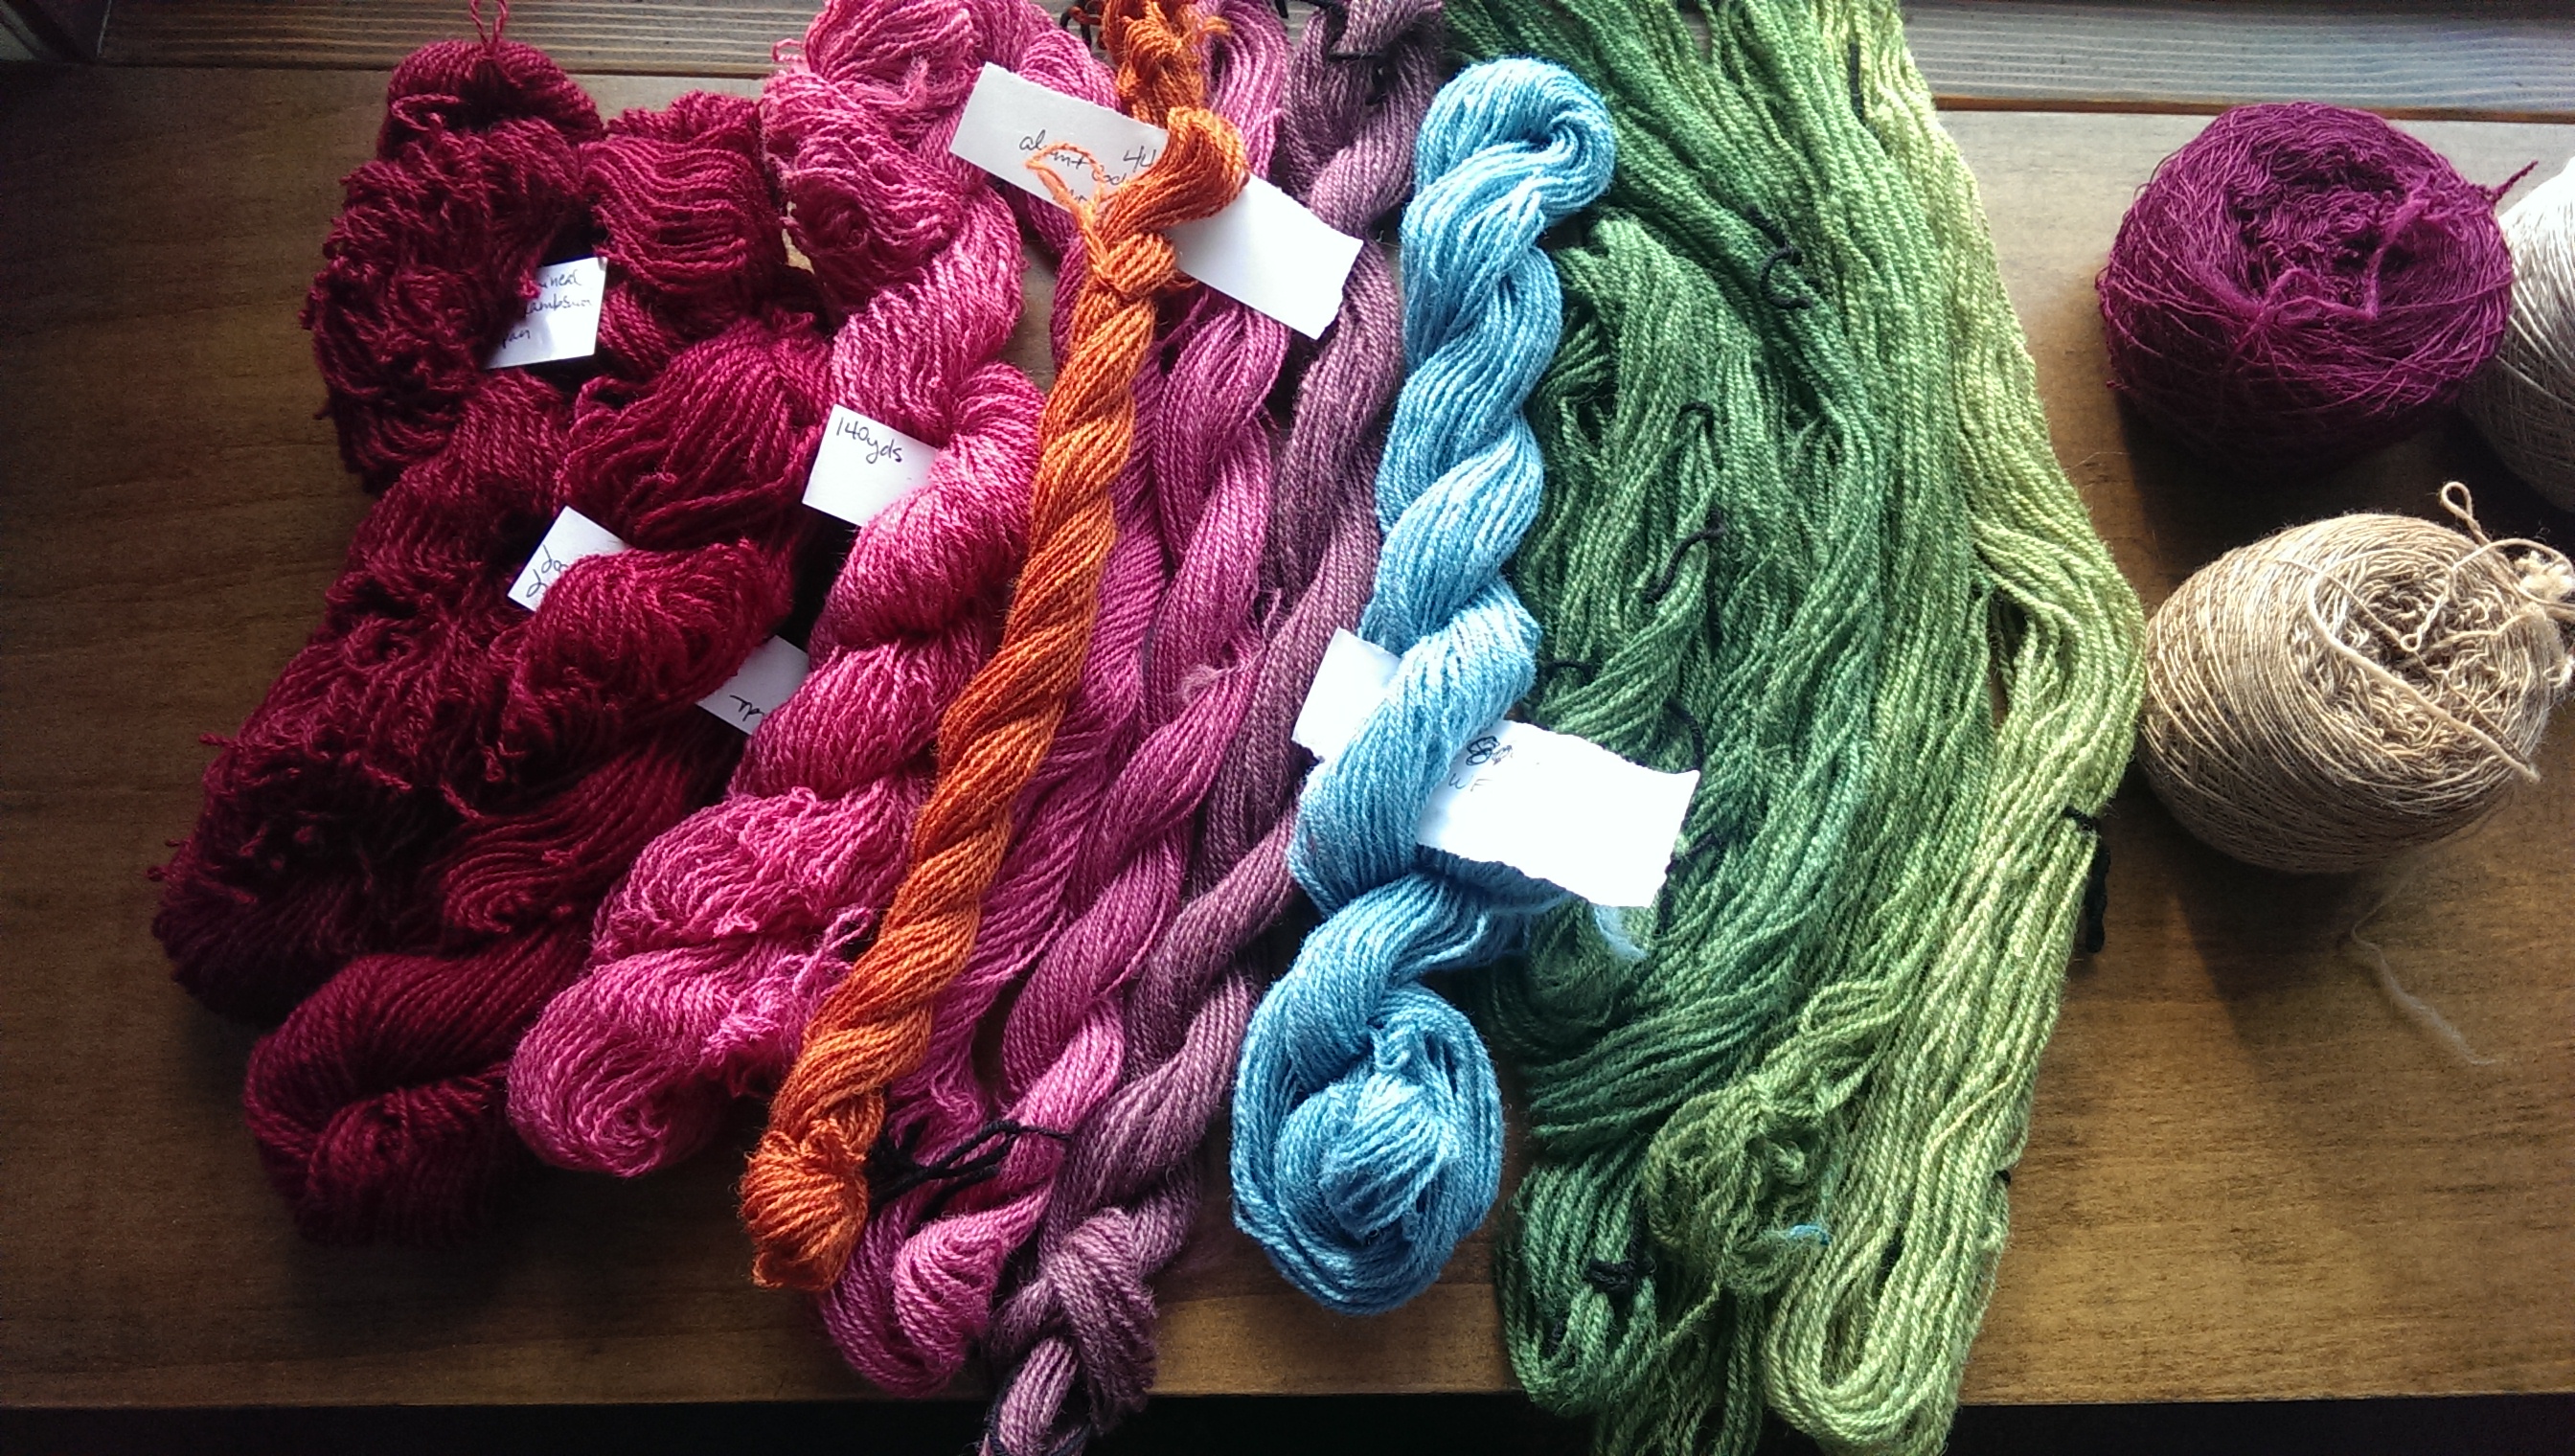
Successive alum mordant, left to right, with copper mordant wound into a cake far right. The orange is the immediately adjacent cochineal overdyed with weld.
I’ve been taking some natural dyeing classes at the Oregon College of Art and Craft, and one of the neat things we did was dye with cochineal with no metal mordants. Instead we used 25% WOF of cochineal, 10% WOF powdered gallnuts (Gallic acid) and 10%WOF citric acid, all in the dye pot at once. Hot tip: we ground up the cochineal bugs and a little water with a mortar and pestle. No soaking required.
We simmered wool and silk noil for an hour and got these lovely colors. The cochineal strikes the wool and silk differently!
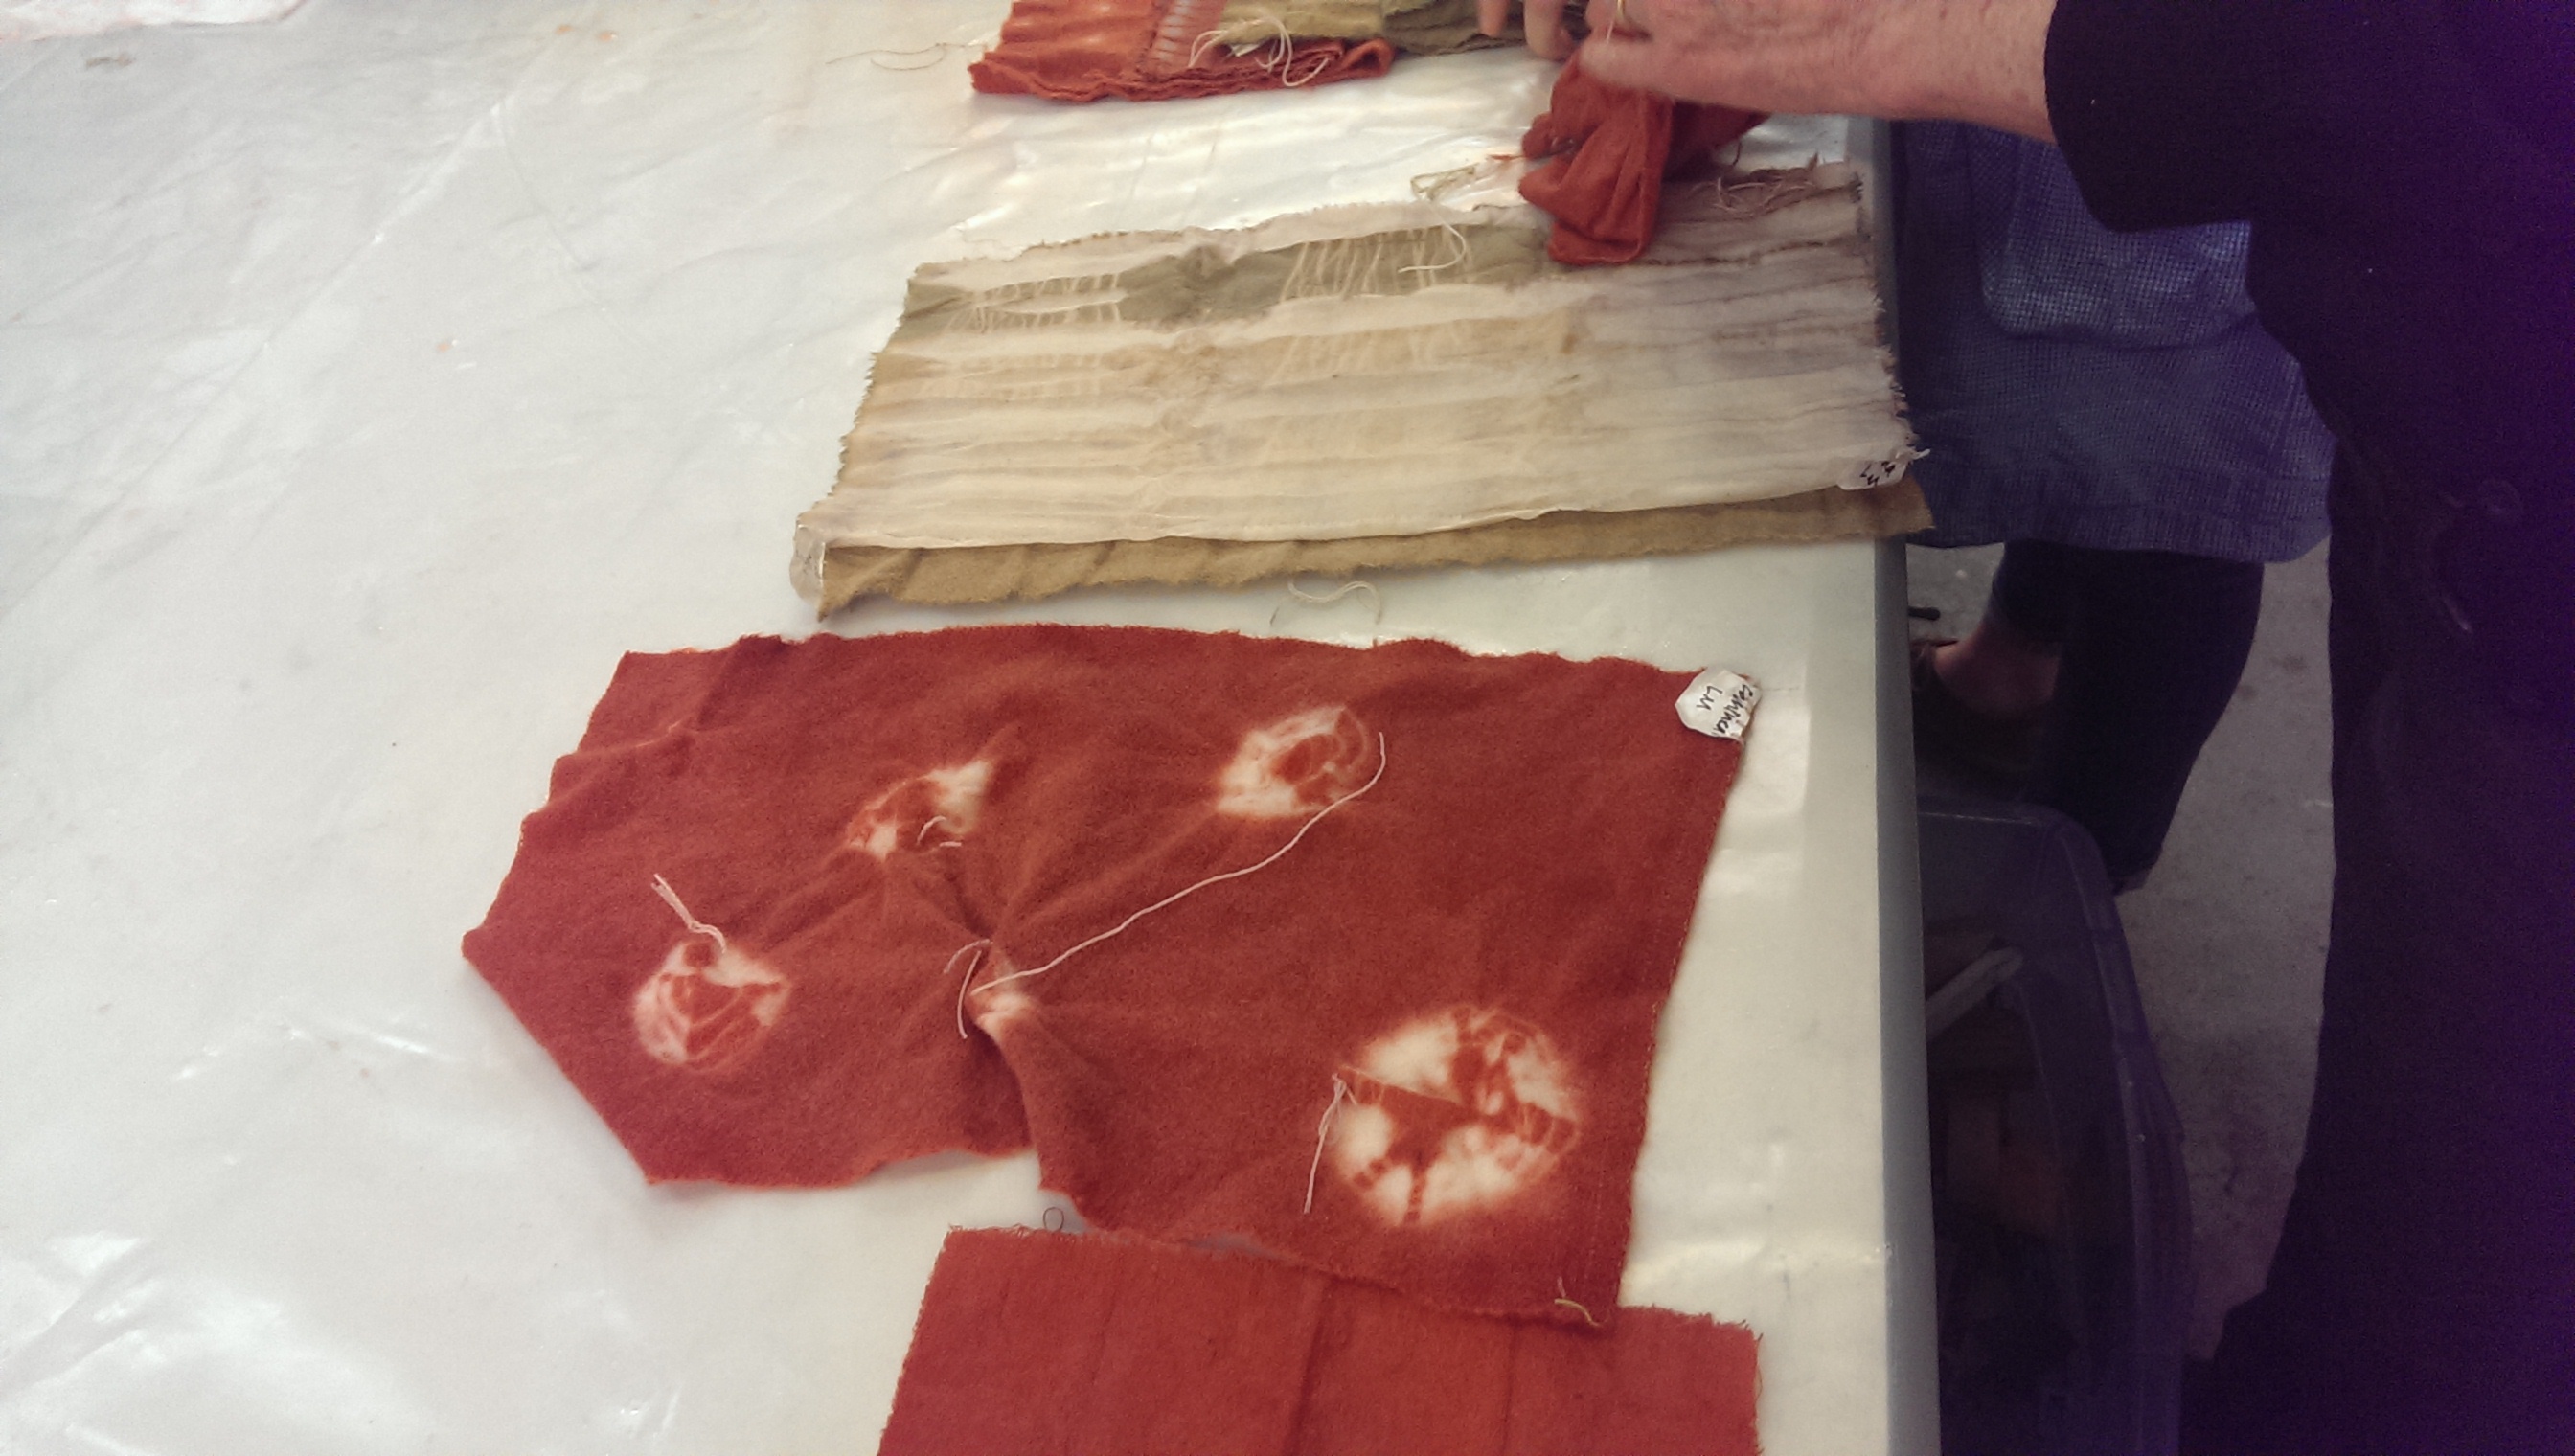
Shibori cochineal on wool

Left, wool, right, silk noil
These are nice colors on their own, but I also wanted to experiment with this dyeing method as a base color. Here is the same fabric overdyed with indigo. One of the very interesting things about cochineal is that the color will shift from red to blue, depending on Ph. The middle samples are overdyed with indigo (about Ph 12) and rinsed, the far right are the same, but rinsed in a white vinegar solution (about Ph 3).
Cochineal overdyed with indigo
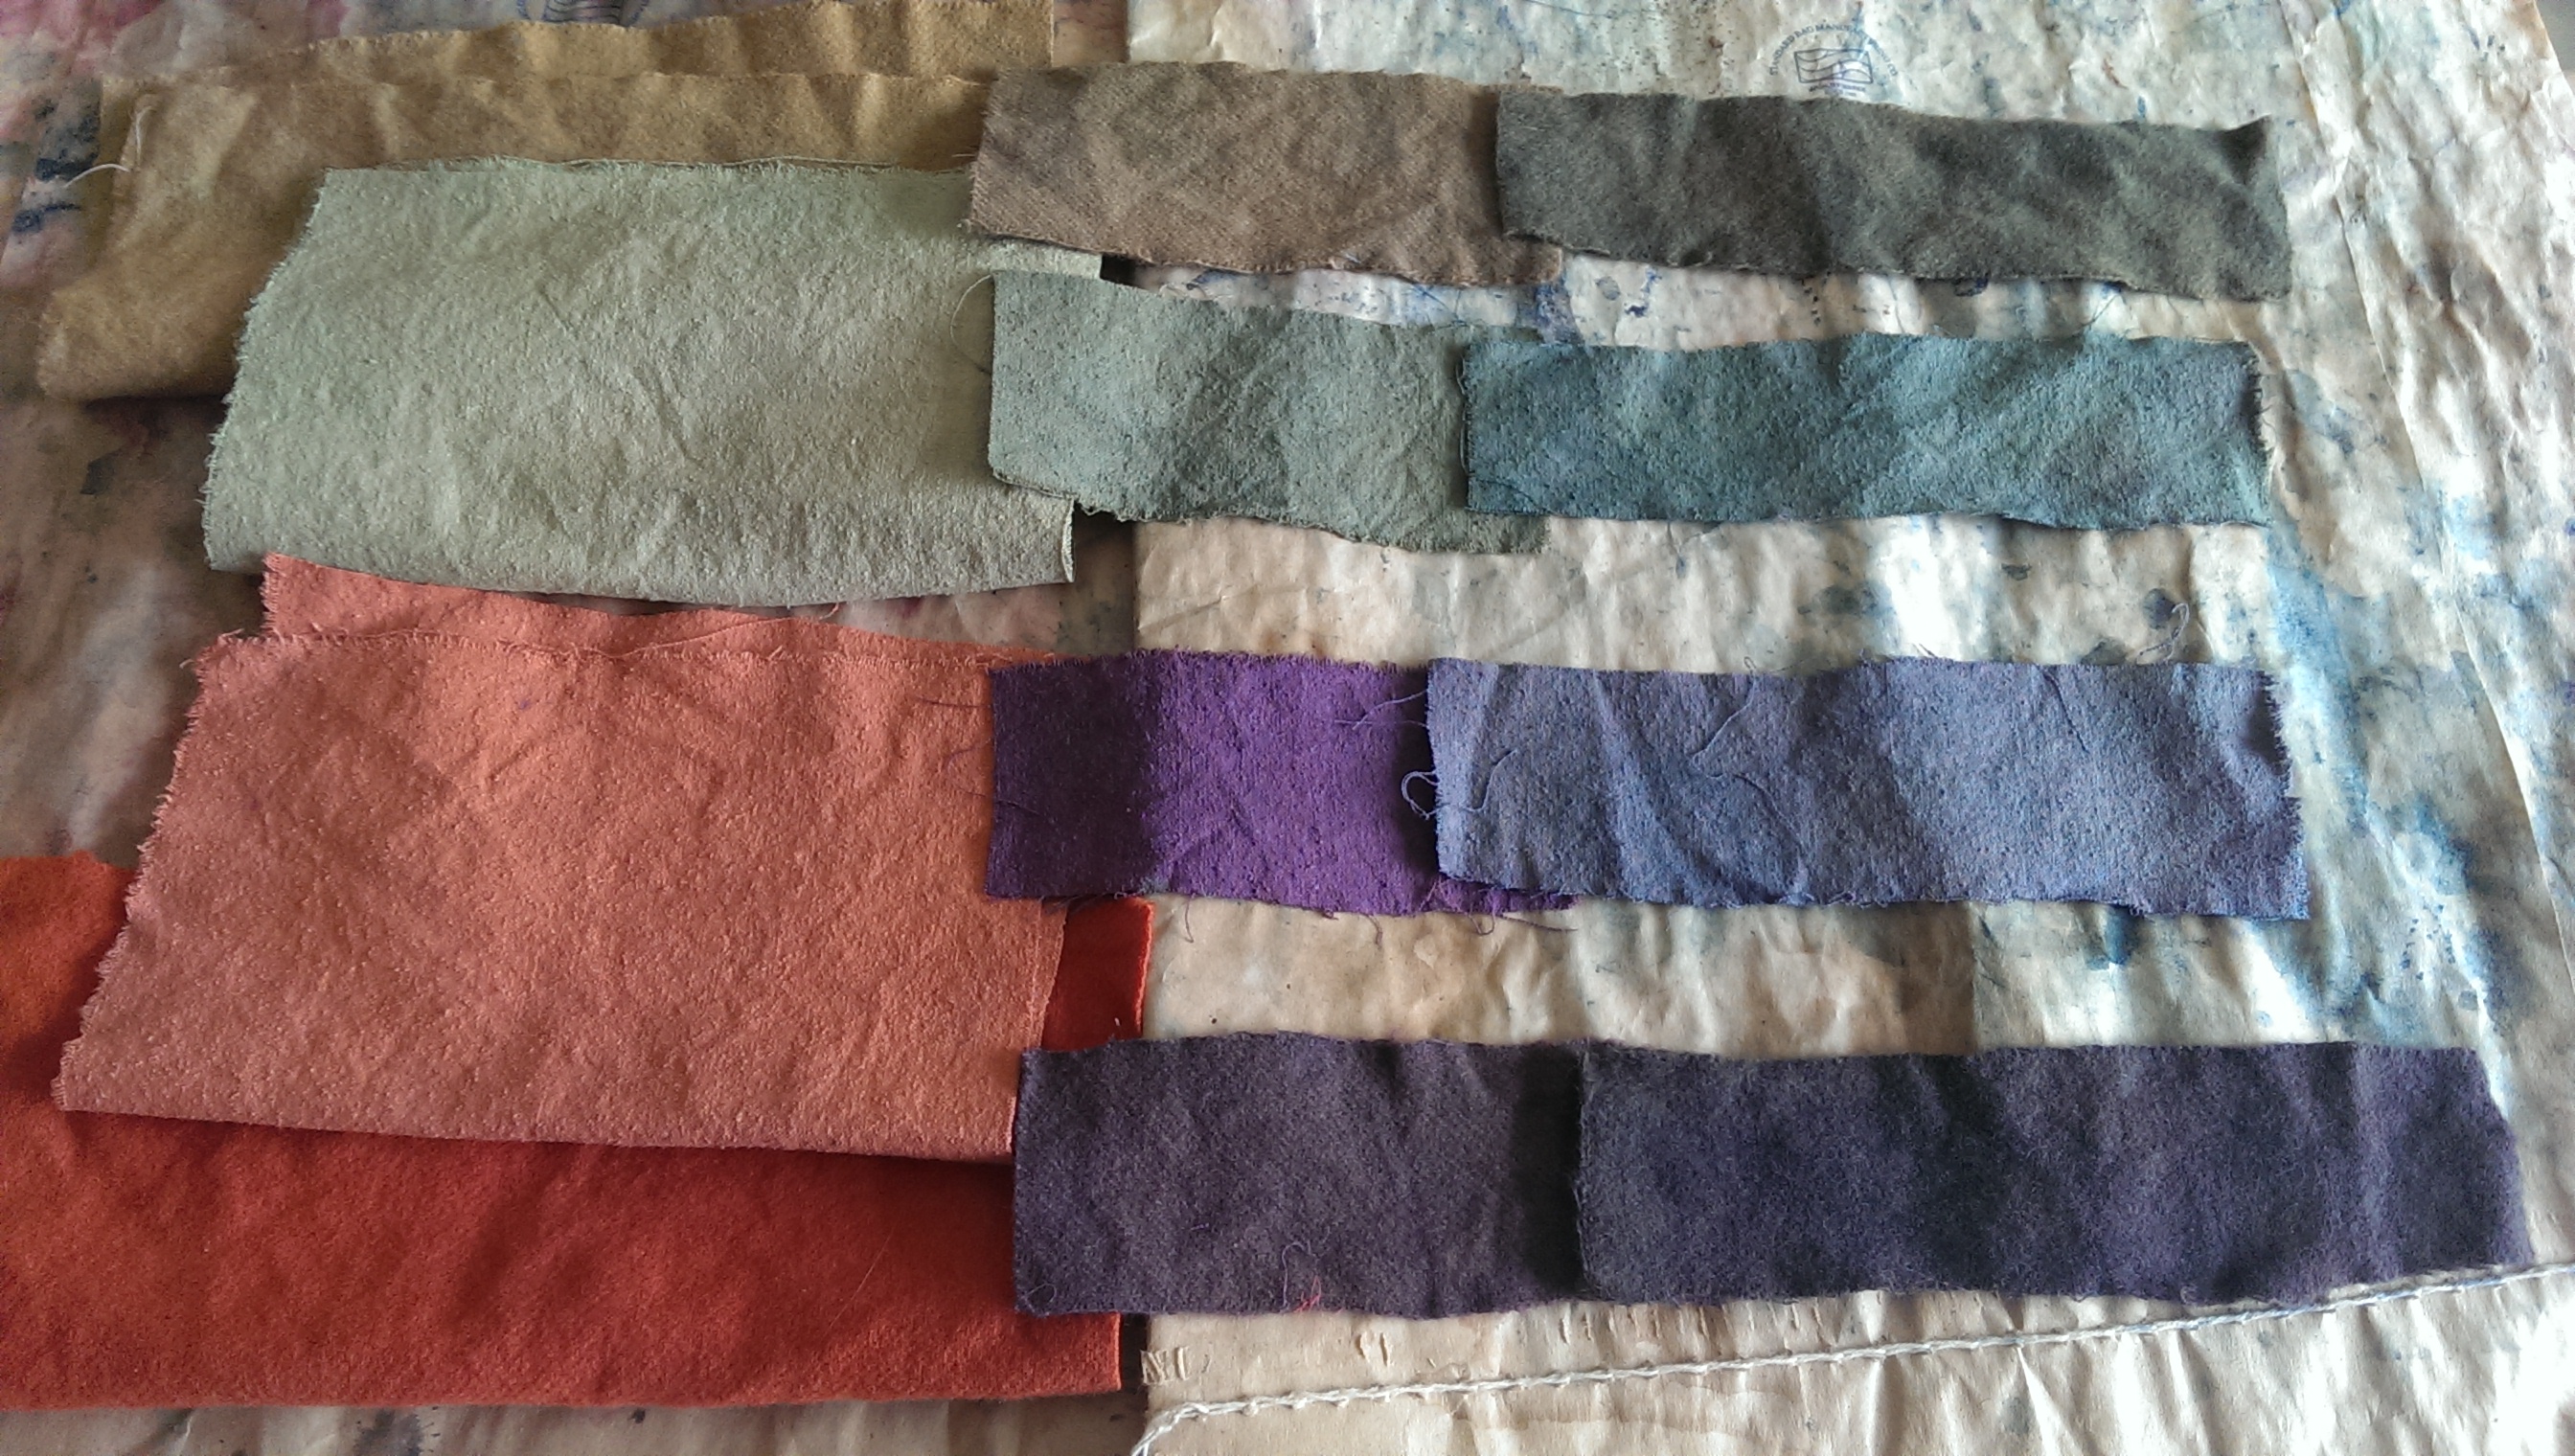
I also tried some after-mordanting, with iron, copper and alum mordants:

Left, iron after-mordant
Middle, copper after-mordant
Right, alum after-mordant
There is really a lot you can do with these little bugs, and a huge range of color, depending on what techniques you use. In other words, fun!
Wow! These samples look terrific and I love seeing so many variations at once. I’m impressed with the samples mordanted with gall nuts and the effects created by shifting pH.
Presumably the after mordanting technique is self explanatory. Did you see anything different using that technique? Is it like the layering technique we discussed?
I think the after-mordanted colors are definitely different than if you’d pre-mordanted and just straight up dyed with the cochineal. The orange-red base just gets modified in this case.
I’m on the lookout for some chemistry details based on when during the dyeing process the mordanting takes place, as with Japanese extraction methods of dyeing.