Nuno felting part one: rub n’ roll

2

Nuno felting is one of those techniques I’ve always admired and wanted to try, but never got my act together to do. A couple of months back I bought Felt Fabric Designs by Sheila Smith and again my interest in nuno felting was piqued.

I was particularly interested in some of the techniques Smith shows “laminating” fabrics using felt and also upcycling thrift store scarves and fabrics into felted patchworks.

But I haven’t tried any of those techniques yet. Usually I dive in and try techniques even if they’re a bit complicated, but this time I tried some of the simpler nuno felting processes.

After a rummage in my closet I found a scarf I’ve never worn. It’s an open weave and 100% silk–ripe for nuno! Here it is on the table before felting. It’s on a strip of bubble wrap. I’ve spread light layers of Wensleydale roving and silk fibers on top.

100% silk open weave scarf readied for nuno

100% silk open weave scarf readied for nuno

The next step was to cover with an old net curtain, wet down with cool water, smooth some olive oil soap over the net curtain and begin to rub!

My good friend and avid felter Gaynor was on the scene to offer advice and lend her fingers for rubbing!

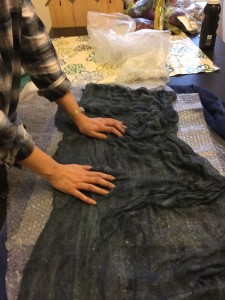
Gaynor flipped the fiber-covered side face down onto the bubble wrap to give it a little extra rub

Gaynor flipped the fiber-covered side face down onto the bubble wrap to give it a little extra rub

The bubble wrap provides the friction to felt the fibers into the silk scarf. Rubbing the fabric and fiber through the net curtain starts the felting process. Once you can peel the netting off without the fibers sticking to it, you remove the netting, place another layer on top then roll it up and begin to roll.

Gaynor’s tip for rolling the fabric in the bubble wrap was to roll the whole thing in a towel and roll it and then roll it some more. We didn’t keep an accurate count but I’d guess we rolled it a few hundred times in each direction?

What do I mean by rolling it in each direction? Well, once you roll your piece of fabric a few hundred times, unroll the bubble wrap bundle and re-roll it from the opposite direction and start the whole process again. It’s good to have a friend to help with the rolling if your arms get tired or you get a bit of finger ache.

Once you’re satisfied the fiber has mingled (or stuck) to your fabric give it a rinse in very hot water. Wad it up in a ball and throw it into the sink a few times. Then rinse with cold water. Take a look at your fabric. Have the fibers you’ve applied felted into it as much as if you would like? If not, give it a few more rolls in the bubble wrap and then the repeat the hot/cold rinses and throwing process.

Gaynor and I found that with this scarf, silk felted really well but the Wensleydale took a lot of persuading. If you’re after a shiny or even metallic effect go for more silk, less wool. Once the fabric is dry give it an iron, which brings out the silk’s shine.

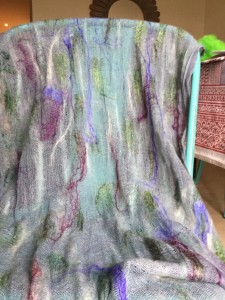
Here’s my final product. I love how this technique has turned a drab unworn scarf into something I’m now wearing all the time. Interested in some amazing nuno felting? Check out the Sheep Cabana Pinterest board.
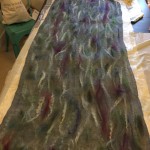
Finished scarf: drab to fab!

Finished scarf: drab to fab!


Get Carded Sideways

1

In one of the rabbit-warrens of the internet I stumbled across this blog blurb by Stephanie Pearl-McPhee (aka the Yarn Harlot) about sending fiber through your drum carder sideways. I immediately alerted Rachel, that this might be a thing. We had to put it to the test.

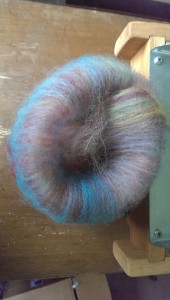
I started with a Corriedale batt that I’d already sent through the carder normally:

Corriedale batt

Corriedale batt

I split it in half and sent one half through again sideways:

What! That orientation is wrong!

What! That orientation is wrong!

This is the result. The sideways batt feels thicker and fluffier. I should also note that the fiber piled up in the middle of the drum instead of being spread out evenly.

Left, standard carding, right, sideways carding

Left, standard carding, right, sideways carding

As a different test, I sent an assortment of different staple lengths and fibers through. Longwool, and very crimpy short wool. I didn’t pick the crimpy short wool apart.

Sideways potpourri. This makes it scientific.

Sideways potpourri. This makes it scientific.

Here’s the resulting batt. Then I spun it all up.

Assorted wools batt

Assorted wools batt

Rachel here: Excuse me while I butt into Sal’s post. First of all can I just echo the WTFness of this sideways drumcarding development. Imagine me sort of open mouthed and wondering wha??? and ??? And thinking, well if the Yarn Harlot AND Judith McKenzie say this is The Done Thing, well….

Like Sal, I had to try this sideways drum carding myself. Sal has already described what happens–smaller, fluffier batts. That’s what I found too. Instead of thick and sometimes compacted batts you get fluffy rolags, like the ones you would make on hand cards–but bigger.

These were very easy to spin, like rolags. There was none of that peeling apart and fussing around with a big batt. It was all the good aspects of a hand carded rolag, only bigger and no sore wrists.

Some of the fiber I used was polwarth/silk roving that’s been in my stash for awhile. It opened up nicely when carded sideways and was a breeze to spin.

Lastly I put some scoured fleece (just washed, undyed, still a bit of a mess) through sideways. Here I didn’t see a huge difference putting unprocessed fleece through sideways. The batts were about the same. Having said that, once I get to the stage where I’m going to blend some of this fleece with another fiber or other colours, I’ll be doing that sideways. I like those big, fat rolags!

Longwool single, twist set

Longwool single, twist set

Sally here again: I agree with Rachel, it does make easy-to-spin batts, especially with the longwool blend I tried. I suspect this may be because, by sending the wool through sideways, I’m actually spinning on the fold with the long fibers. I was also able to maintain some of the crimpy locks, which would have been carded apart going through aligned. I think this is definitely a great way to do an art batt.

Test single, both standard carding method and sideways

Test single, both standard carding method and sideways

When I was spinning the batt that was half normal/half sideways, I noticed a definite difference in how the yarn felt while spinning, which I would attribute to a worsted vs. woolen preparation. The sideways portion looked like it was going to have more of a halo due to the fibers not being lined up. If I look very closely, they may be slightly fuzzier, but after washing and setting the twist on the single, there is really very little difference.

So what do you think, Rach, is this actually a thing? My take, it’s definitely not NOT a thing!

Rachel: Sal, I have to agree with you. Not a Thing. I wouldn’t advocate a sideways-only approach to drumcarding. If you want to spin rolags, yes go sideways. If you want to open up some compacted roving, go sideways. But sideways only? I’m not so sure about that.

What I would suggest is being careful about how much fiber you load onto your drumcarder. Don’t overload.


Spinning in the grease

3

Sally and I talk about fiber preparation a lot. Conversations usually start off with a confession.

Rachel: “Um I just bought more fleeces.”

OMG! Where did these come from???

OMG! Where did these come from???

Sal: [laughs] “What are you going to do with them?”

Rachel: “Well right now, they’re in my closet.”

Then we discuss all the processes we could use to turn the raw fleece into The Ultimate Yarn. There’s scouring, combing, carding, dyeing and blending. Then there are infinite techniques–have you heard of the Fermented Suint Method for scouring fleece? Do you card your fleece or comb it? Do you put your fiber into the drumcarder sideways?

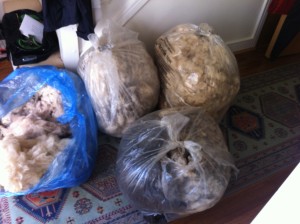
Last fall, after buying a few more Shetland fleeces I was so excited to try them out on the wheel that I pulled off some locks and started spinning. No fiber prep at all.

Spinning in the grease isn’t something I usually do, but a lot of spinners do. These are the people who look at you funny when you start talking about scouring fleece and the other fifteen steps you’re going to take before you spin any yarn.

What I learned was spinners who advocate spinning in the grease have a point. One is, if you have a beautiful fleece with nice crimpy locks, it’s a shame to process that out. It’s fine just to tease the locks out a little with your fingers and start to spin. I would recommend, however, picking through the fleece first and removing the dags (poo) and larger bits of vegetable matter. You don’t want that.

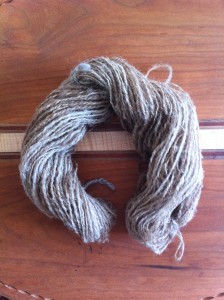
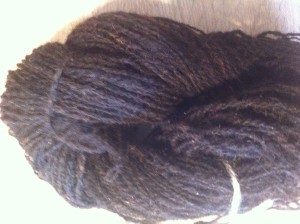
Here’s some Shetland spun in the grease. The yarn plumped up nicely after washing.

Shetland spun in the grease

Shetland spun in the grease


Shetland after washing

Shetland after washing

Here’s some Zwartables I spun in the same way.

Zwartables spun in the grease

Zwartables spun in the grease

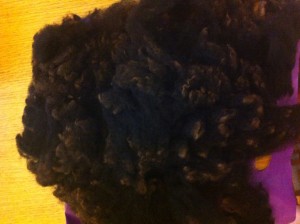
Zwartables fleece

Zwartables fleece

Yes it is a bit smelly and you should clean your wheel afterwards. Really the final result is the same as if you’d spent days scouring and carding and combing and all the rest.

Safety Note. You do need to be careful handling raw fleece. Pregnant women should not handle raw fleece. Be aware that raw fleece is likely to have sheep excrement on it–so avoid handling that with bare hands. Choose from the sections of the fleece that’s not near the animal’s rear end. Give your hands a thorough scrub when you’re finished. Then wash them again!

From fleece to fair isle, part 1

0
Fair isle is trendy

Fair isle is trendy

For at least 18 months I’ve been telling Sally how trendy fair isle is. “It’s so trendy,” I say. “Look at how many fair isle designs are in the magazines!”

In theory, I love fair isle. The the colors and miniature designs are enchanting. I’ve bookmarked loads of fair isle patterns on Ravelry and I’ve amassed a pile of magazines full of patterns. Alice Starmore’s Book of Fair Isle Knitting is on my shelf and I’ve mentally knit every Kate Davies pattern. Mentally. I admit I’ve bought a few fair isle sweaters to soothe the fair isle itch.

I’ve knit a couple of fair isle items, but spinning yarn to knit up in fair isle intimidates me. Getting the gauge and color right just seems hard, especially if I were doing a whole sweater. So I’ve put it off.

Until the other day when I was beset by a fit of madness. The sun was shining and I set up the drumcarder on a table in the garden and started cranking out some batts. The idea being to spin up some yarn to make two fair isle hats.

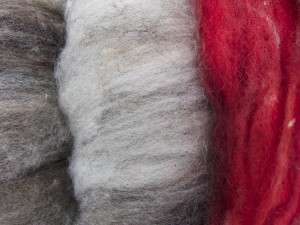
Now the question is how do I turn this hodgepodge of fiber:

Hodgepodge

Hodgepodge

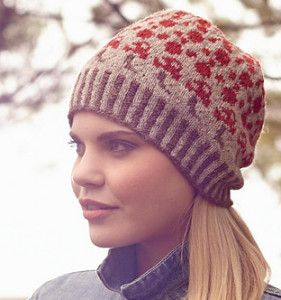
Into the Toadstool Hat.

toadstool hat

toadstool hat


After a bit of carding–using both the drum carder and hand cards–I came up with some shades that at least resemble the ones used in the patterns. I’ve used a real hodgepodge of fiber–shetland (some from Sal’s sheep Blackberry!), finn, a little alpaca here and there as well as some merino from the depths of my fiber stash.

Batts

Batts

Like I said, getting the shades to approximate those in the patterns will be a challenge. I’m not going to be upset if they’re not the perfect hue. Some of these will require further blending with hand cards before spinning. Hand cards are not just a color blending tool, but fabulous fiber fluffers. On a project like this spinning from fluffy rolags will be perfect.

What I am concerned about is thickness of the singles and the finished plied yarn. My yarn always tends to be a bit on the thick side. However I do have some Jamieson 2-ply to show me exactly what I’m trying to achieve. I’ve also dug out my yarn gauge.

Another resource is the Spin your own Fair Isle kit article from Knitty, which got me started on this in the first place. Lots of good advice and step-by-step instructions.

Now for the spinning.