Handmade gift ideas for men

6

The leaves are just starting to change colour and fall, but the Christmas puddings are on the shelves at the shops and it’s just a matter of time before the first pre-Christmas sales begin.

Over the past few years my sister, mother and I have been giving each other handmade gifts at Christmas. Mom makes wonderful hooked rugs and cushions and my sister has made us beautiful felted stockings, knitted scarves and sweaters. I’ve woven wraps for my mom and made yarn and soap for my sister.

This year I want to make a gift for everyone in my family–luckily we are a small group! The problem has been coming up with something different and useful for my dad and husband.

I did a search for DIY/handmade gifts for men and the options some of the ideas were hilarious–a bouquet of bacon, flavoured toothpicks and “restore an heirloom axe“. Also apparently beard oil is The Thing, but we are a beardless bunch.

Not all the ideas I saw were totally crazy and here are some that aren’t beard oil, bacon, scarves or hats.

Utility tote by Don Morin

Utility tote by Don Morin

Man bag: I was telling Sal about this tote bag my dad uses as a sort of briefcase. It is a freebie from a pharmaceutical company he was given for judging a science fair. It is ripe for replacement.

I found this utility tote pattern by Don Morin. It’s perfect, and as Sal says all I have to do is stencil some drug logos on it.

There are loads of free patterns for messenger bags out there both knitted, felted and sewn. How about upcycling some jeans or natural dyeing or printing on some organic hemp fabric then sewing it up into a bag? There are so many ways to use your fiber arts and sewing skills for a messenger bag.

Finlayson "sweater" (Thread Theory)

Finlayson “sweater” (Thread Theory)

Sweatshirt: I love this Finlayson Sweater from Thread Theory. I’m going to make this up for my husband. I’ve got some jersey fabric in my stash. There are some nice organic jerseys available now that could be naturally dyed. Or maybe you have some handwoven you could use. Here’s a link to our guide to using handwoven for sewing projects.

For further inspiration: Independent designers have some beautiful sewing patterns for men now. Check out Walden, Thread Theory, Hot Patterns and Merchant and Mills.

Man scrub: Men like a good scrub just as much as women. Last year I wove washclothes using Syne Mitchell’s Loop-pile washcloth pattern from her book Inventive Weaving on a Little Loom. I used cotton, but she has a hemp/aloo version which would be a great alternative to those plastic shower poufs. Once this one has outlived its usefulness you can throw it on the compost pile and make another one.

There are knit and crochet options. Here’s a shower mitt from yarnspirations which could be knitted in hemp or cotton. For crocheters, here’s a loofah.

Do you want to make homemade soap? You should. Look no further than Humblebee & Me. Loads of idea not just for soap, but things like DIY tiger balm, after shave and lip balm.  This woman is a genius.

Slippers: Slippers are a classic dad gift. There are so many patterns to choose from including: Martha Stewart’s, Drops’ felted and these gorgeous ones from Arne & Carlos.

There are some upcycling possibilities here. Why not use old sweaters,  felt them and sew them into slippers. You could sew a bit of old denim on the bottom to make them sturdier.

Dice bag: Do you have any gamers in your life? How about a dice bag? Here’s a knitted one–twelve – sided no less! You could run up one on the sewing machine maybe with Doctor Who fabric? Or Space Cats!!!

Mug cosy: Another classic. Again there are loads of patterns on Ravelry. But you could easily use woven fabric or even sew them with your favourite novelty fabric. Free patterns galore online.

Other ideas might be making a belt on an inkle loom or knitting a pair of socks.

One last idea which is not sewing/fiber arts related, but I think is a great idea for a Fathers Day present–homemade barbecue rub. My dad would definitely use this! Thanks Martha.

Last year Sal wrote a post on gifts for the fiberista. Lots of good ideas here.

Please let us know your ideas for making for men.

Fresh Leaf Indigo

4

The hardest part about dyeing with fresh leaf indigo is growing the indigo. One of the people in my natural dyeing study group did all the hard work, and brought it in to share. This is what fresh Japanese indigo looks like:

Japanese indigo, persicaria tinctoria

Japanese indigo, persicaria tinctoria

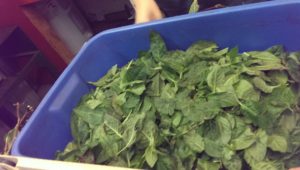
The leaves are picked off the stems:

2016-09-27-18-42-19

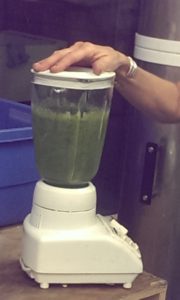
Then blended with ice water:

2016-09-27-19-25-25

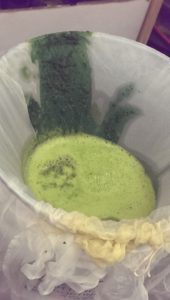
And strained through a cloth (in this case, silk):

2016-09-27-19-29-35

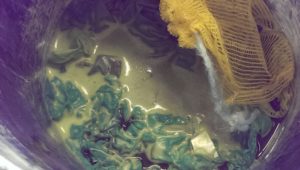
We squeezed out the cloth to extract as much juice as possible, and this was our dye bath. We put our fiber in, a mix of wool, linen and silk:

Fresh indigo dye bath

Fresh indigo dye bath

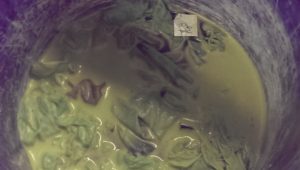
We massaged the items in the bath occasionally, and let them sit in the bath about an hour. The bath began to oxide:

2016-09-27-19-43-03

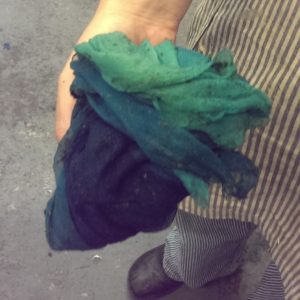
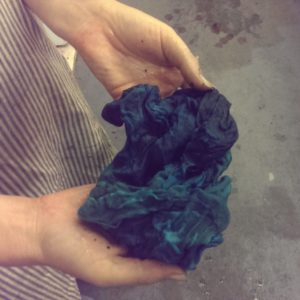
We then removed the items from the bath and let them air out. The color slowly changed from green to blue on silks, a pale green on linen, and a dark blue-green on wool. The oxidation time was much slower than with a reduced-indigo vat.

This is the silk straining cloth:

Straining cloth after several batches

Straining cloth after several batches

Straining cloth after half an hour

Straining cloth after half an hour

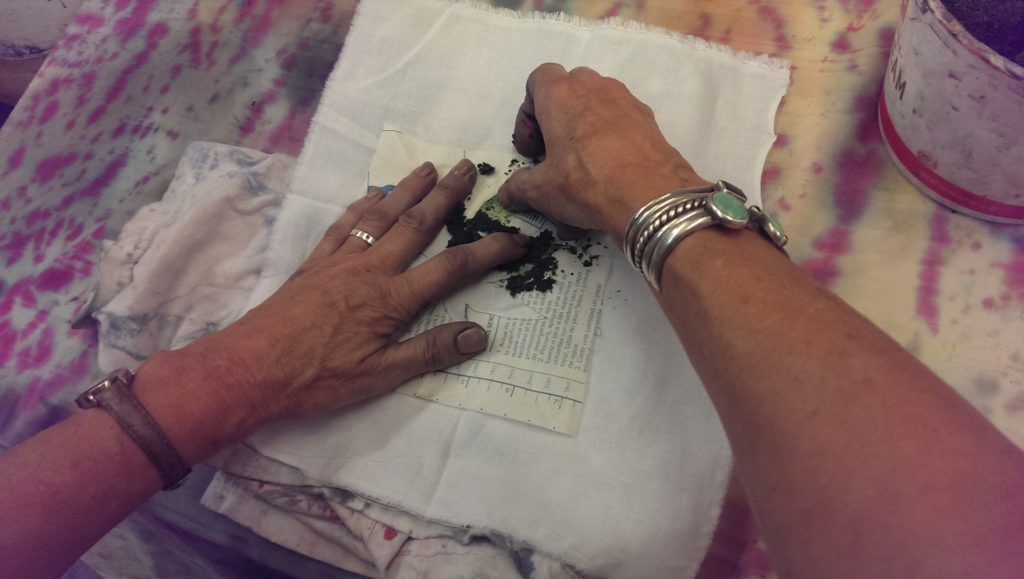
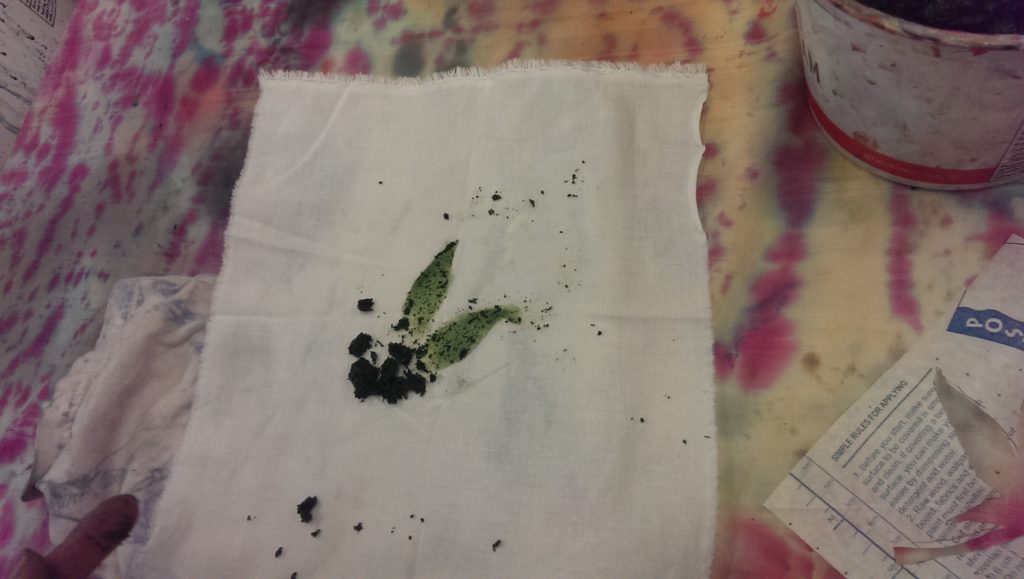
Bonus round: we also used the leftover pulp from the straining cloth to  “paint” on fabric— basically rubbing it into the fiber like a grass stain.

2016-09-27-20-07-01 2016-09-27-20-08-13

We let the pulp-prints dry and oxidize before rinsing. And although we did not do this step, here are instructions to precipitate out the indigo from a fresh bath, to use in a reduction vat. It’s a great teaching article using fresh woad.

Japanese indigo seeds are available from various places on line, and the plants like a warm, humid environment. Humid places can get several crops per season before the plants die. Places that are dry in the summer (like western Oregon) can get one crop during the growing season with irrigation.

How simple dye techniques can help bust your stash

1

This is the story of how a ball of pink mohair yarn, a bit of acid dye and a microwave helped me transform some long-forgotten yarn into exactly what I needed to knit the sweater I want.

Like many knitters, I have a lot of yarn bought in a fit of love at first sight, only to linger in a box for a few years. I keep telling myself it will all get used. Eventually.

When I was given a ball of hot pink mohair yarn last weekend, I thought: yes, I can use that and I think I have some yarn to go with it.

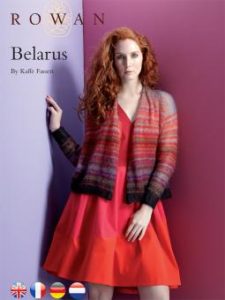
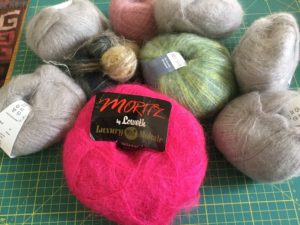
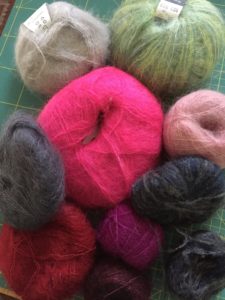
Turns out I had quite a few odd balls of mohair in my stash–green, grey, blue and light pink. I found this pattern on Ravelry and thought, that’s the one.

Belarus, by Kaffe Fassett

Belarus, by Kaffe Fassett

This pattern calls for nine colours. I had five–hot pink, light pink, green, grey and blue. My options were change the colour scheme set out in the pattern or dye the grey yarn I had to create four more colours.

Here I made some assumptions. The first was that the fiber content of the grey mohair would take the acid dye. It’s mohair, silk, nylon, polyester and metallic. I also assumed I could get good colours over-dyeing the pale grey yarn.

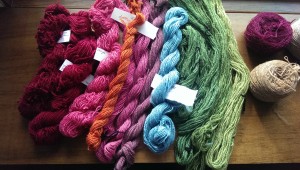
Selection of mohair yarn from my stash

Selection of mohair yarn from my stash

Luckily those assumptions turned out to be correct . However if you want to dye commercial yarn in a colour that might not look nice over-dyed… I would definitely test first. Also make sure to check the fiber content of the yarn. Protein fibers–silk, wool–dye the best with acid dyes. Some synthetics take acid dyes too. Cottons and other plantern-based fibers (bamboo, hemp, linen etc) require different dyes completely.

Once I planned out which colours I was going to dye my grey yarn, I got out my microwave (one I use for dyeing), a scale, a ball winder, some glass jars, the dyes and some vinegar.

1. Thinking I wasn’t going to need a full 25g of yarn for every colour, I divided two balls into four using my ball winder and scale. I ended up with four balls roughly 12-13g each. It’s critical not to wind the yarn too tight or the dye won’t penetrate into the yarn closer to the centre of the ball.

2. Soak the yarn in warm water and a bit of white vinegar. Easy does it. You don’t want the yarn to felt or get into a knotted mess.

3. Get your dyes out and prepare them. For small quantities of yarn you will need very little dye powder. I probably used about 1g of dye per 12g ball I dyed. Put the dye in some warm water, stir and add a little vinegar.

I used Ashford’s purple and black dyes to get the purple and dark grey colours. For the wine colour I used Jacquard dyes’ russet and a very little Ashford navy blue. For the red I used Jacquard’s fire red.

Put the yarn in the dye. Make sure it’s  not too crammed in there otherwise the yarn will dye unevenly.

Put the jar in the microwave for 2-3 minutes on high. Let it sit for 5 minutes or so, then give it another 2-3 minute blast. Let it sit and cool. If you haven’t overdone it on the dye, the water should be clear and the dye bath exhausted.

4. Carefully rinse the cooled yarn and squeeze out the excess liquid. Now let it dry.

I’m pleased with my results. The grey yarn took the dye nicely and the colours are close to the ones used in the sample. Sure they are not identical, but that isn’t an issue for me.

Nine colours ready to knit

Nine colours ready to knit

Next yarn to be over dyed: the balls and balls of yellow wool my mother gave me a few years ago. Yellow really isn’t my colour, but I’m pretty sure I can make them into something I will like.


Sewing a simple garment with handwoven fabric

0

Whenever I show my mom one of my weaving projects she asks the same question: “is it a table runner?” The question sets my teeth on edge. Long and relatively narrow woven fabric could be mistaken for a table runner, but as my friend Sarah Howard has demonstrated many times over with a little imagination it can be so much more.

Saori weaving books show many of quick and creative ways to use handwoven to make simple garments. If you are looking for a tailored garment these aren’t for you. Take a look at what Sarah does.

What I like about these saori projects is their simplicity. You don’t need to be a whizz with the sewing machine and you don’t even need a pattern. What you do need is a tape measure and a pair of scissors (or a rotary cutter) a ballpoint needle for your sewing machine and maybe some iron-on woven interfacing. Ballpoint needs are used for sewing jersey fabrics and work great on handwoven. Definitely use one.

IMG_2162

I wanted to make the draping collar vest in the Beginners’ Saori Clothing Design book. The book is very clear that these garments are designed for the average Japanese woman—5′ 2″ (157 cm) and 120 lbs (54 kg). The draping collar vest “pattern” calls for fabric 40 cm (15 3/4 in) wide x 172 cm (1.88 yards) long. That piece is then cut into three–2 x 54 cm, 1 x 64 cm– two pieces of equal length and one longer piece which becomes the collar.

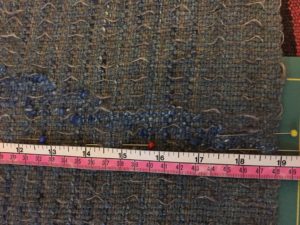
For my vest adjustments had to be made. I measured my back–from the neck to the top of my butt and from my shoulder to the top of my waist to get ballpark measurements for width and length. Keep in mind your woven fabric will shrink when you finish it. Whatever your measurements are, add on some more to account for shrinking.

I made my fabric about 50 cm (19 3/4 in) wide and ended up being 211 cm (2.3 yards). That was plenty. After washing the fabric by hand in hot water and a little soap I was ready to go.

First step was to figure out how long to make my pieces. I subtracted 172 (length of suggested fabric) from 211 (length of my fabric). That gave me 39 cm which I divided by three to get 13 cm. To increase the size of the original pattern, I added 13 cm to each piece, which gave me two pieces at 67 cm and one at 77 cm.

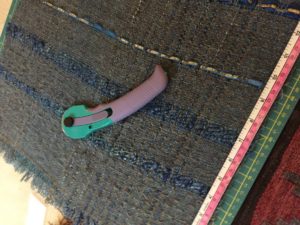
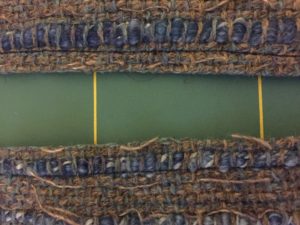
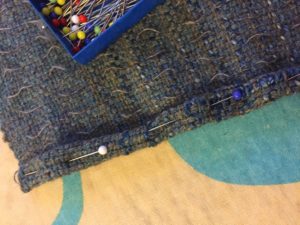
Now for the cutting. Saori weaving books suggests sewing two lines across the fabric and then cutting between the pieces. This is to minimise fraying. Remember the old saying measure twice, cut once? Definitely follow that rule when working with handwoven. In the photo below I’ve mapped out where I want to sew with a trail of pins.
pins in a line to follow for sewing.

pins in a line to follow for sewing.

I sewed to lines and then cut between them using a rotary cutter. Scissors are fine.

cutting between the lines

cutting between the lines

The next step is adding a hem on to the tops of all three pieces. I simply rolled the fabric over, pinned it and then sewed.

pinning and sewing the hems

pinning and sewing the hems

Once the hems are sewn, lay out the three pieces of fabric right side up. The longer piece is in the middle, lining them up at the bottom and overlapping them slightly. Pin into place.

lay out fabric right side up, sew on the right side

lay out fabric right side up, sew on the right side

On the right side, sew 5 cm from the shoulder to the arm hole, leave however much you want for an arm hole (about 25-30 cm) and then sew the rest of the seam. Repeat on the other side. Flip over and make a small hem on along the bottom (on the wrong side). I ironed on a small strip of interfacing and then did a zigzag over it.

Et voila!

Finished garment

Finished garment

IMG_2169

How To Cheat at Yarn Samples

2

I’m a half-hearted swatcher at best. And I’m lazy. If I have a very specific project in mind then I’ll sample and swatch to make sure the colors, gauge and finished knit sample are what I want. But I will also admit to buying pretty dyed braids solely because I’m intrigued by the color combinations…and I will just sit and admire them without a plan to best showcase them. I hate doing spinning swatches with these braids, in part because I only have 4oz in that colorway, and if I don’t like the result I end up with less finished product once I come up with something I do like.

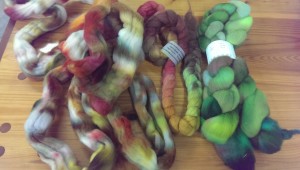
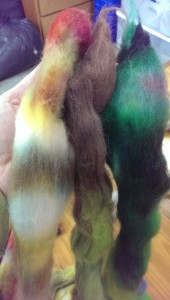
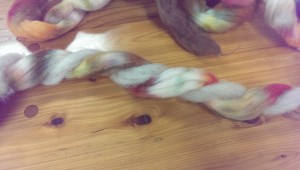
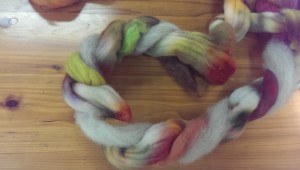
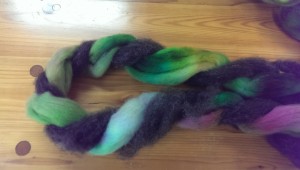
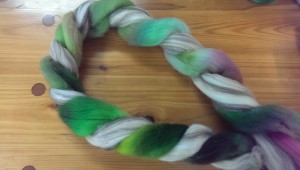
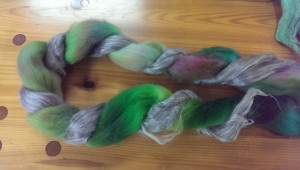
I bought these three braids last year, thinking they went together color-wise. I’m sure I could make a Knitty möbius shawl, or I could send them through the drum carder a little and they would blend together nicely. But I bought these braids because the colors are placed together as they are, and I’m interested in how plying can bring out the best (or not) in a finished yarn.

What to do with you braids?

What to do with these braids?

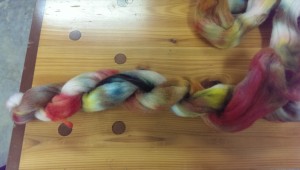
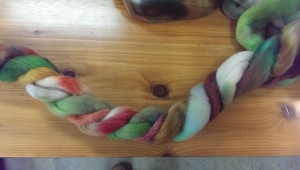
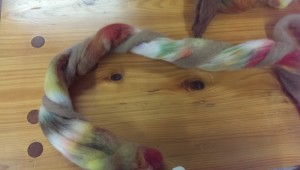
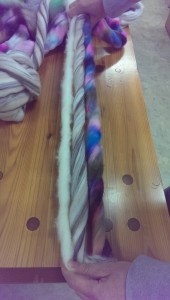
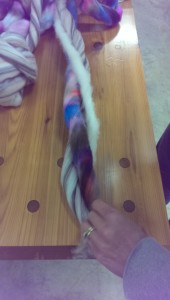
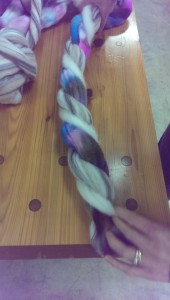
I had an idea: if I treat each braid as a macro single, I can get a reasonable idea of how any sort of finished yarn would look. It’s not a complete replacement for making sample yarn, but it gives a fair idea of how the end result will read. I simply put some twist into the roving and away I went. Here’s the roving on the left, plied onto itself:

Two-ply

Two-ply

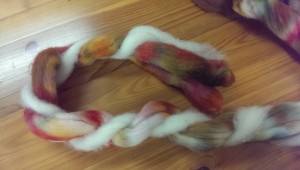
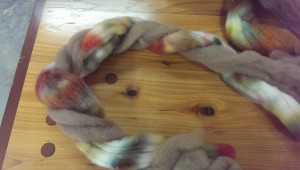
All the white in that braid really shows up. It’s kind of busy. Here it is as a two-ply with the alpaca braid in the center of the first photo:

image

Two-ply with alpaca braid

This isn’t displeasing to me. The alpaca definitely cuts down on all the white.

Here are the three braids plied together in a three-ply:

Three braids...

Three braids…

image

…three-ply

Now that I look at them like this, I can see that the sea-foam blue in the mostly-green braid really doesn’t look good to me with the other colors. What are you doing there, sea-foam?! The good news is, I haven’t spun any yarn yet.

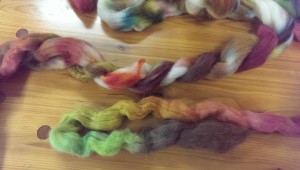
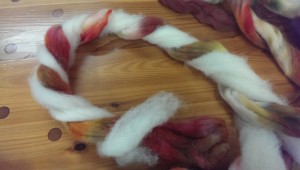
Here are some more options, plying with white Shetland roving from my sheep:

Two-ply

Two-ply

image

three ply

I like the two-ply, I think the three-ply has too much white. However, with the right project it could be nice.

Some more options, with a natural brown ply:

Two-ply with brown

Two-ply with brown

Three-ply with brown

Three-ply with brown

Three-ply with alpaca and brown

Three-ply with alpaca and brown

I think if the brown roving was a little richer in color it would look fabulous. I could either over-dye that brown roving, or actually clean and card the lovely brown fleece from Charlie that’s sitting in the barn.

Here’s what I finally ended up with, and the good news for me is that it might enable me to start in on a project that I’ve had in mind for a while. I split the difference between the brown and the white roving, and tried a white with red-tipped Shetland lambswool fleece that I bought:

Brown and white heathered roving

Brown and white heathered roving

Two-ply

Two-ply

Three-ply with heathered roving and alpaca

Three-ply with heathered roving and alpaca

I really like this. The bright colors pop without being too garish. I think it will be a pretty, interesting yarn that I will be excited about spinning and knitting with.

Now for the green braid that didn’t actually go with the other two. I sort of assumed I’d ply it with black:

Two-ply with charocal

Two-ply with charocal

But that sea-foam is still a problem to me!

image

Two-ply with cyan

Again, the white parts just really stand out in a clunky way for me.

Here we have plied with a natural-colored merino blend:

Blended colored merino roving

Blended colored merino roving

image

Two-ply

I like this better than plied with the dark colors, which surprises me. If I’d been spinning to swatch I don’t think I’d have even bothered to try this. The other thing I like about this technique is that I can get an idea of how the barber-pole striping might look.

I also like this option, plied with a yak/silk blend:

Two-ply with yak/silk

Two-ply with yak/silk

For me, this is the winner. This might motivate me to spin up some Blue-the-goat mohair and do a boucle with this. In any event, I’m excited about this braid again, instead of feeling vaguely guilty that I haven’t done anything with it.

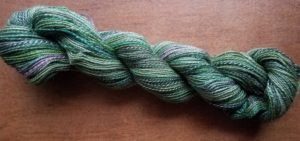
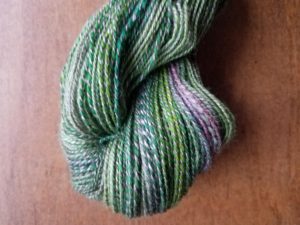
Update: here is that green braid actually spun up with the yak/silk. As I was playing it I felt disappointed in the result, but once I skeined it, it really loosks just like my quick sample, except much, much nicer:


Here is La Technique:

image image image


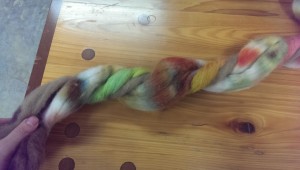
Add twist (in the same direction) to your “singles”. Hold them together, then turn them back around each other in the opposite direction until you have a nice ply. It took me just a little practice to get the hang of it, and now I can make mock-ups of all kinds of yarns. I’m pretty excited about this, because now I can make decisions without making any commitments.

Carding by hand–la technique

3
Millet's Woman Carding Wool

Millet’s Woman Carding Wool

“The purpose of the carding process is to align, thoroughly, all the fibres and to spread them evenly across the carders. This process is essential for the production of a woollen thread and is often employed in preparation for a semi-woollen and semi-worsted yarn.”

—Eileen Chadwick, The Craft of Handspinning

Why use handcards when you can use a drumcarder? Handcards are easily portable and great for blending colours. They are also perfect to make rolags, which are, I believe, the best preparation for longdraw woollen spinning.

Gradient of natural colours. Carded by hand

Gradient of natural colours. Carded by hand

I like my handcards, especially for making rolags. Yes I could use my drumcarder, but for a recent project where I wanted to achieve a gradient effect for a woollen yarn, I stuck with my handcards. Rolags seemed like the way to go for a nice woollen yarn. Carding up rolags is not particularly time consuming once you get the hang of it. You will quickly get a feel for how many rolags you need to spin a bobbin of singles.

Here’s a short video of me demonstrating how I card.

I’m not saying this is the way. It’s the way I was taught by an experienced guild member and reflects the technique Chadwick described in her book.

A couple of tips for handcarding success:

  • Don’t overload your cards with fiber. Handcards aren’t designed to take big quantities. Go for 5-10 grams at a time.
  • Easy does it, don’t grind your cards together.
  • Don’t worry that all the fiber doesn’t transfer from one card to another. It’s not supposed to.
  • If your forearms get sore, you’re doing it wrong. Stroke one card gently over the other.
  • Check out Eileen Chadwick’s carding how to: pages 33-37 of The Craft of Handspinning.

    finished project!

    finished project!

Fun with Cochineal

2

After indigo, I bought a cochineal dyeing kit which contained the bugs, several mordants and some vague instructions. (I say the instructions were vague, but really they gave several options as far as time vs. temperature in mordanting. It’s one of those things that once you know what’s going on makes perfect sense.)

Rachel and I did a test run when she was here last April (Sheep Cabana retreat: dye as much stuff as possible in 48 hours), and here is what we came up with:

Cooking and straining some cochineal bugs

Cooking and straining some cochineal bugs

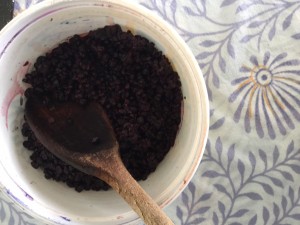
We started with 4oz of dried cochineal (which is a lot), cooked them for about an hour and then strained the liquid into the dye pot. I saved the used bugs for later. Then we mordanted our wool. We used some white Shetland and some grey mohair locks, and mordanted with both alum and tin, by simmering our fiber in each mordant bath for about an hour. I would say that our mordanting pots weren’t large enough, because the tin-mordanted wool definitely felted.

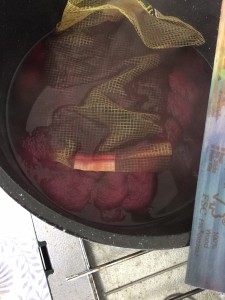
The dye pot

The dye pot, onion bag of mohair locks on top

We could have used a bigger pot.

Viola!

Viola!

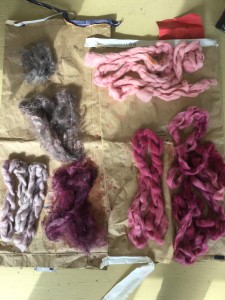
Here are the results, from top clockwise: tin mordanted wool, alum mordanted wool, alum mordanted mohair, iron after-mordanted wool, iron after-mordanted mohair.

Rachel left, and after a couple of months I got out the leftover cochineal bugs again and tried some more dyeing. (Those bugs sat on my patio in that plastic container, above, the whole time, ignored. I had no issues with them rotting or anything else unpleasant.) I re-simmered the bugs and left them sit overnight in the pot, and strained the bugs out in the morning. Then I did a series of successive dyeing on 50g each of alum and copper-mordanted wool:

Top, alum mordant Bottom, copper mordant

Top, alum mordant
Bottom, copper mordant

I heated the cochineal dye pot, added the mordanted wool and let it sit out on the patio here either all day or overnight. The total hands-on time was probably 1/2 hour.

Here it is spun up:

Successive alum mordant, left to right, with copper mordant wound into a cake far right. The orange is the immediately adjacent cochineal overdyed with weld.

Successive alum mordant, left to right, with copper mordant wound into a cake far right. The orange is the immediately adjacent cochineal overdyed with weld.

I’ve been taking some natural dyeing classes at the Oregon College of Art and Craft, and one of the neat things we did was dye with cochineal with no metal mordants. Instead we used 25% WOF of cochineal, 10% WOF powdered gallnuts (Gallic acid) and 10%WOF citric acid, all in the dye pot at once. Hot tip: we ground up the cochineal bugs and a little water with a mortar and pestle. No soaking required.

We simmered wool and silk noil for an hour and got these lovely colors. The cochineal strikes the wool and silk differently!

Shibori cochineal on wool

Shibori cochineal on wool

Left, wool, right, silk noil

Left, wool, right, silk noil

These are nice colors on their own, but I also wanted to experiment with this dyeing method as a base color. Here is the same fabric overdyed with indigo. One of the very interesting things about cochineal is that the color will shift from red to blue, depending on Ph. The middle samples are overdyed with indigo (about Ph 12) and rinsed, the far right are the same, but rinsed in a white vinegar solution (about Ph 3).

Cochineal overdyed with indigo

Cochineal overdyed with indigo

I also tried some after-mordanting, with iron, copper and alum mordants:

Left, iron after-mordant Middle, copper after-mordant Right, alum after-mordant

Left, iron after-mordant
Middle, copper after-mordant
Right, alum after-mordant

There is really a lot you can do with these little bugs, and a huge range of color, depending on what techniques you use. In other words, fun!

Daffodils, St David’s day & Welsh cakes

3
Welsh cakes

Welsh cakes

It’s St. David’s day, the day commemorating Wales’ patron saint. It’s a day for daffodils and making welsh cakes, which are a sort of scone/pancake hybrid and delicious.

Today I embarked on some St David’s day-inspired craft activities–dyeing with daffodils and heather–and made a batch of Welsh cakes. The cakes are all but eaten and I have some dye results to share.

I was inspired by an article in YarnMaker to use daffodils as dye stuff. The sample in the article was a lot more yellow than what I’ve been able to achieve. However, I’m sure if I used more flowers I would have gotten a stronger colour. Still I like this pale yellow.

imageHere in England the daffodils have been out for a few weeks and there are many more to come. Anyone who has waited all winter to get out and gather some fresh dye stuff, daffodils are a great place to start  I used 6-8 small blossoms for the dye stock and mordanted my Norfolk Horn yarn with alum and cream of tartar. The dye stock was a vivid yellow but it took quite some time for the colour to strike. I’m going to try this again with a greater quantity of flowers.

Daffodils, alum/cream of tartar mordant

Daffodils, alum/cream of tartar mordant

Winter-flowering heather is a hearty if tiny blossom that gives orange/brown to grey and brown/grey colours. It’s another option for those looking for fresh dye stuff in the winter months. Heather is associated more with Scotland than Wales, but I’ve used some handspun Llanwenog to keep the Welsh theme going.

Heather and a few mahonia berries

Heather and a few mahonia berries

I used a few handfuls of white heather blossoms in my dye pot and after awhile a orange/brown colour appeared.

The first sample (bottom) here is with the alum/cream of tartar mordant which to my eye has made a light rusty brown. (It’s not easy to see in the photo).

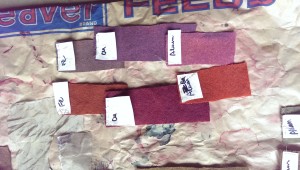
Top: heather, iron mod  Mid: heather, copper mod Bot: heather, alum/cream of tartar mordant

Top: heather, iron mod
Mid: heather, copper mod
Bot: heather, alum/cream of tartar mordant

The second sample (middle) was from the same dyepot to which I added copper sulphate as a modifier. To me this sample is somewhere between a yellow, a pale green and a brown, depending on the light and what colours it sits next to. It doesn’t look like much, but I love it’s subtlety.

The final sample (top) is again from the same dyepot with iron added as a modifier. I see a pale blue/grey. I love how these three sample look together. I can envision using this palette in a weaving project or perhaps a sweater or wrap.

Spring time is still a few weeks away, but more dyestuff is popping out of the hedgerows and flower beds everyday. It’s been warm here and I’ve seen gorse for a few weeks now and the first broom flowers have started to appear. Gorse gives a yellow and its smell is unbelievable–think pineapples and coconut. Broom should also give yellow with alum and a green with copper.

Warm weather means that sunny spots other flowers are growing. Keep your eyes open for calendula. There’s also leftovers to gather. I pocketed a few handfuls of Mahonia berries the other day. Allegedly they give some colour. There are also ivy berries and acorns.


How to choose a fleece for handspinning

9
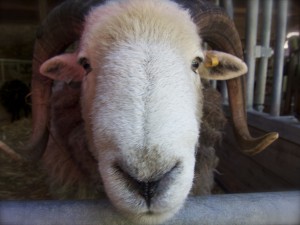
Herdwick: cute, but not a fleece for beginners

Herdwick: cute, but not a fleece for beginners

Buying my first fleeces to process at home for handspinning was hugely exciting. I’d just been to my first meeting of the Mid-Essex Guild of Weavers, Spinners and Dyers and it happened that two of the members were having a fleece sale that day.

I was lucky to have two experienced guild members there to show me how to look over a raw fleece. They unrolled the fleeces and talked me through what I was looking at, pointed out some of the desirable qualities that hand spinners look for in a fleece. Those are attributes like crimp, softness, good lock structure, cleanliness (no straw, grass or poo, etc). More on that later.

The first fleeces I bought were a Hebridean, a Shetland and a Ryeland. Maybe I went a little overboard. It took a lot of work to get the fleeces scoured, dried and ready to spin. And even though I benefited from having some experts on hand to help choose my fleeces, if I were to do it all over again I would have done my homework first.

Before buying a fleece, I recommend reading up on different breeds and the characteristics of their fleece. There are about 60 sheep breeds in the UK alone and all their fleeces are a little different.

Some, like Cotswold, Teeswater, Lincoln, Leicester and Wensleydale–longwool breeds–have fleeces that are more hair-like, lustrous and require some experience to spin.

Then there are the Downs breeds–Southdowns, Oxfords, Hampshires, Dorsets for example–which have dense fleeces with short staple-lengths, but feature lots of crimp and bounce.

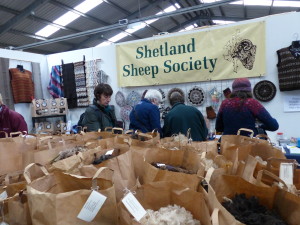
Fleece sale!

Fleece sale!

Then there are the many other breeds that are favourites of hand spinners, like the Shetland, Blue-faced Leicester, Cheviot, Manx Loaghtan and Jacob, which all have their own characteristics. There are also plenty of breeds which aren’t particular favourites of spinners, either because their fleece is too coarse or just not suitable for spinning.

So before jumping in and buying a fleece take a look at some of the books available like Fleece and Fiber Sourcebook or The Spinner’s Book of Fleece to get an idea of what you might like to spin as well as the huge choice available.

There are other questions you want to ask before diving in and buying 4-5 pounds of raw sheep fleece. Are you going to make a worsted or woollen yarn? It will be hard to spin a woollen yarn from a long wool, for example. Which fleeces will best suit your project? Do you want a coloured fleece? How important is softness in your project? Are you looking to create something durable or more lightweight?

What to look for in the fleece 

Now that you’ve decided on a breed, what are you looking for when choosing the actual fleece?

Steve Kennett, vice chairman of the Association of Guilds of Weavers, Spinners & Dyers, visited my guild back in September to speak on how to pick out a fleece.

Steve unrolled one of the fleeces supplied by a member and gave a few pointers on picking a good one. It had a lovely staple length, beautiful crimp and was muck and VM-free. Steve held it up to demonstrate how the fleece should be nice and open—like a lace curtain.

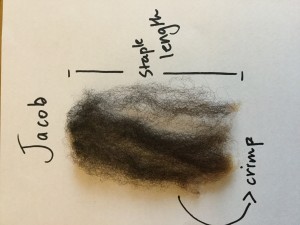
Jacob lock from raw fleece. Nice staple length and crimp, no breakage or second cuts

Jacob lock from raw fleece. Nice staple length and crimp, no breakage or second cuts


You can see in the photo of the Jacob lock what I mean by crimp. It’s simply the little waves in the wool. Crimp makes wool easy to spin as it twists together and the crimp helps the wool lock together. The rule of thumb goes that the more crimp, the finer the wool. Merino, for example, can have 100 waves (crimps) per inch. Longwools have less crimp and often used  by spinners to add texture and lustre to yarn.

Steve Kennett also said to look out for second cuts (short bits the shearer missed on the first pass) felting and second growth—ie when a sheep hasn’t been sheared and begins to grow a second fleece. He recommended  taking off a lock of fleece, holding it firmly in one hand and giving it a good tug. If the lock is breaks avoid the fleece as it is brittle, will not be nice to spin and could result in weak yarn.

The best part of the fleece is going to be on the neck, front legs and back (between the shoulders). Fleece on the back is generally good. Fleece from the hind legs is generally coarser and kempy. Steve recommended being picky about fleeces and perhaps buying several, but only using the best bits.

I don’t know if I’d go to the lengths Steve does–buying many fleeces and throwing a lot of it away. If I were to go back in time, I’d probably have started with one fleece (Shetland) and made life easier for myself. If buying a whole fleece is intimidating, get a friend to share one with you.

Starting with a fleece instead of tops or roving is, I think, a great way to learn more about sheep breeds, fiber prep and spinning. Fleece you’ve scoured and prepared yourself is going to feel and spin differently from commercially processed fiber. Some of the women in my guild consider commercial prepared fiber to be “dead”, because they view it as flat and lacking crimp. I agree with that to a certain extent, however I have found that top or roving from smaller mills tends to retain some of the bounce and crimp.

Gotland sheep Commercial top (l) Raw fleece (r)

Gotland sheep
Commercial top (l)
Raw fleece (r)

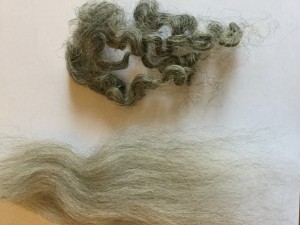
Still it’s an eye-opener when you compare commercially prepared roving with that you’ve cleaned and carded yourself. Take a look at this Gotland fiber. On the left, straight up commercial roving, on the right Gotland right off the sheep. Looks a lot different right? Doesn’t even look like it came from the same breed.

For more information on scouring fleece see these posts: Hot tips for scouring fleece or More hot tips on scouring fleece without soap.

Mitten Mission

6

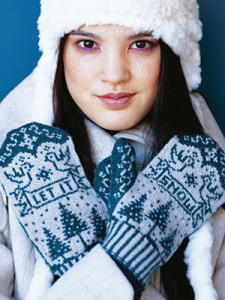
54eb64f8dbe5a_-_diy-style-knitted-snowbird-mittens-mdnWhatever your brand of fiber fancy– knitting, weaving, crochet or felting–mittens are small canvases for  your creativity. Mittens can be bulky or refined and most knitting traditions have their own take on shapes, patterns and embellishments.

This year the Mid-Essex Guild’s holiday challenge is mitten making. I’ve only knit one pair so far, but I have done a bit of armchair traveling while browsing mitten patterns.I picked up The Mitten Book little volume of mitten patterns from Gotland, an island off the Swedish coast, home to the eponymous sheep. In its overview of knitting in Gotland and the wool trade is a description of typical Gotland mittens. The yarns were dyed with natural dyes and the traditional patterns took inspiration from nature heavily featuring ivy and wildflowers–columbine, clover, roses– as well as wheel motifs and birds.

Traditionally mittens were knitted with the date or the recipients name or initials on the cuff or body. Sometimes mittens featured collars that extended all the way to the elbow. Mittens were often felted to give them added firmness and durability.

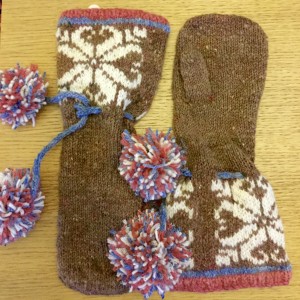
My version of Jodis mittens

My version of Jodis mittens

This description tells a story of an everyday piece of winter clothing at once sturdy and practical but also carefully embellished and personalized. Their patterns and construction ties them to a place and time. You could say the same about mittens from other traditions–fair isle, Norwegian, Estonian, New England etc. Mittens are made to keep us warm, but mitten-making is a wholly creative undertaking.

I want to take a quick look at Maine mittens, before I get onto sharing a few of my favourite patterns and hopefully inspiring everyone to run off and make mittens.

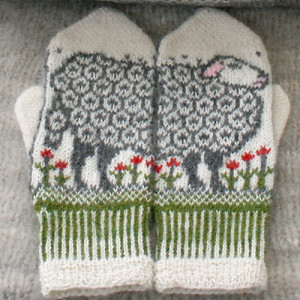
Sheep mittens

Sheep mittens

In Fox & Geese & Fences, A Collection of Traditional Mains Mittens, author Robin Hansen observes that these days most mittens and winter clothes are made in countries where it is never cold enough to wear them:

“…the mittens are usually just silly, knit from brightly colored synthetic yarns, and so thin that one can see skin through the stitches. …for mittens, northern peoples must rely on their own traditions and products.”

In Maine, writes Hansen, mittens are knit for density and thickness with good mobility. Mittens are knit fine and tight, felted, or using special stitches to increase thickness:

“Some Maine mittens are meant to be worn wet, soaked in salt water and wrung out before each wearing. Inland in Maine, mittens are knit with two strands of yarn in close all-over patterns reminiscent of the palm of a Norwegian mitten. … Another traditional Maine mitten is knit with bits of combed fleece tucked into the knit, creating a fluffy lining that changes to a thick, woolly mat with use.”

Tatiana

Tatiana

That’s one U.S. state with many mitten traditions. It turns out the fleece-stuffed (thrummed) mittens and caps are an import from Newfoundland and Labrador, which reminds us that when knitters travelled their patterns and techniques went with them. Here’s a how-to on Thrummed Mittens. There are some beautiful examples on Ravelry.

Anyway…mittens.

There are loads of patterns to choose from and I’ve put together a gallery of a few of my favourites on Ravelry. Amongst my very very favourites are the poetry mittens and the sheep mittens. I love anything with colour work and those poetry mittens, well how cool!

These Tatiana mittens are just fabulous. So creative. I also love the Let It Snow ones.

The ones I actually knit were the Jodis mittens from Rowan’s Nordic Knits. The pom-poms were a big attraction for me and I like the length on the cuff. This pattern has you knit the mittens flat, which works fine. But in future I think knitting in the round is better, because flat fair isle knitting is a drag. Spoiler alert–those are the ones I made for  the Guild competition. Further spoiler alert, I don’t think I’m going to win. Not that I’m competitive.

Handwoven and sewn

Handwoven and sewn

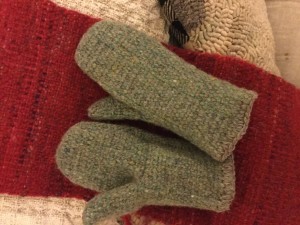
I also made some little mittens out of some felted handwoven fabric following this tutorial. The instructions are for making mittens out of felted sweaters and use a thin fleece lining. If you’re using felted handwoven you might not bother with the lining. These were very easy to make. Definitely try out this pattern.

If I have time I may knit one more pair of mittens before the Christmas. If I do, it will probably be the Let it Snow pattern. I love those birds!